I have a fun new bike project (I know I haven't finished the fixie, it will be done soon). My friends have been telling me about this bike for a while. I guess Dan (editor of the Scottish 60/- video) tried to jump this bike off a curb and well the rest is history. I have never worked on tandems, so this is a great chance for me to learn (read these tandem bike FAQs). The good thing about this bike is that it looks pretty basic and is already in good shape.
This is now my fourth project and I understand the need to take a lot of pictures. I mostly focus on the order of washers and screws. It is amazing the number of different size screws you can have on one bike and the thing that drives me crazy is there is no need. Plus, that means you need to keep changing tools during assembly (rant over). The lesson I really learned on the last project is the need to immediately add captions to the pictures. When you are taking macro photos of parts it is easy to lose the location on the overall bike. And I'm thinking this would be even more difficult when working on a tandem (2 of everything).
So I figured out what was wrong with the bike. It was about a 2 minute fix. Basically the rear (stoker) crank was locked up. I think when the bike was "supposedly" jumped off the curb the chain popped off and got caught between the 2 rear chain rings. It took a bit of convincing but I was able to get the chain removed. Unfortunately, this bike has just been sitting in a damp concrete garage with zero maintenance. Which on these older steel bikes means rust (lube your bikes). The good news is with a new rear chain and a bit of rust removal this thing will be looking good.
Enjoy the pictures.
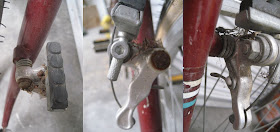
Front Brakes
Rear Brakes
Rear Derailleur
Step 2 - Cleaning & Ordering Parts
Step 3 - Assemble & Ride


Who leaves such an awesome bike sitting in a damp, cold, concrete garage? Maybe now that you've fixed it up, the owners will actually take care of it.
ReplyDeleteJeffrey,
ReplyDeleteYou have probably wondered about the history behind the holes drilled in the cranks and in the frame. These were evidence of Dan's father-in-law's efforts to render this tandem power-able through a system of hand cranks.
Hi, do you know if this in cro-moly steel or Hi-ten?
ReplyDeleteI've seen one for sale.
I am not sure. Do you know of a simple way of testing? And why would it matter to you?
DeleteDid you ever get any idea what year this bike was made? I have one very similar to it, and am wondering what year it is.
ReplyDeleteI did not.
DeleteOk, thanks anyway. I like your work, and I like the attitude that almost any bike is worth putting back on the road rather than into a dumpster.
DeleteTotally agree. I just wish I had more time for projects like these. They are such a great way to see how things work and learn.
Delete