I currently have quite a few friends that are pregnant or breast feeding (like my wife). I felt bad that they can no longer fill their glass from my keezer. My solution was to put some water in a keg to make soda water. Then I made soda syrups or concentrates.
This whole process was a lot easier than I thought. The carbonated water is pretty basic, just add filtered water to a keg. I was worried that the carbonation wouldn't be high enough for a soda. My keezer settings are on the high side around 2.75 CO2 volumes (fridge at 40 F, Pressure 15 psi) because of the styles I normally have on tap. And I actually like this level as it not spritzy on your nose, but is still obviously carbonated. If you have a fancy setup then by all means crank up the pressure.

My idea to use syrups to flavor my soda was 3 fold:
1. I am still experimenting with flavor profiles and didn't want to commit to 5 gals of anything
2. With syrups it is much easier to adjust your sweetness or flavor level. I tend to prefer less sweetness than my wife
3. More variety
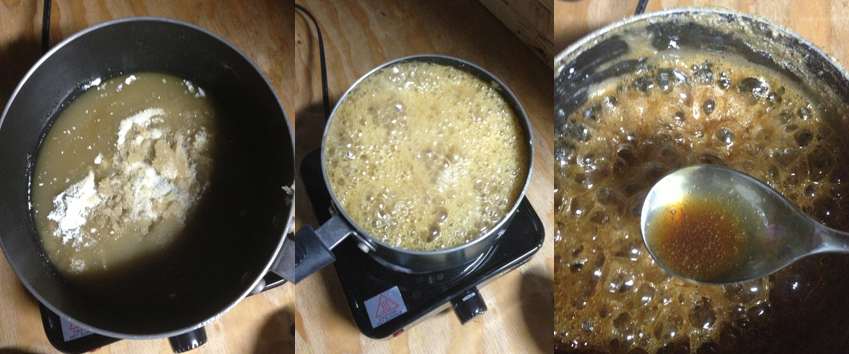
The syrups are also pretty easy to make. I started by just looking for soda recipes online - I just don't add the water to the recipe. Here are a few to get you started:

Basil Lemonade w Jalapeno (Original Recipe)
 2 parts simple syrup (1 part sugar to 1 part water) - heated to dissolve the sugar with 1 cup of basil leaves and allow to seep with the lid on for 30 minutes
1 part lemon juice
1/2 - 1 jalepeno or any pepper of your choice
Mix everything together and allow to cool in the fridge. Stored mine in mason jars in the keezer.
Improvements: I plan to make extra thick syrup (2 cups sugar to 1 cup water) and therefore you would only need 1 part syrup to juice. This just allows you to make more soda with less syrup.
Honey Cream Soda
 Honey Simple Syrup (1 part honey to 1 part water) - just heat enough to mix without driving off flavor
2 vanilla beans - I bought the variety pack (it's cheap) and Tahitian taste the best so far - more fruity and less extract tasting. I shopped around and Vanilla Products USA had the best selection and deals.
Split the beans and scrap the goodness and put everything into the heated syrup and allow to cool in the fridge.
Improvements: The honey was a bit over the top, so next time I might substitute half the honey for turbinado sugar.
Ginger Ale (Original Recipe -yeast)
 2 cups Simple Syrup
1.5 oz Ginger - Minced or Grated - I used my hand held microplane (like this)
2 Tbls Lemon juice
Take ginger and let it steep for 60 minutes in heated simple syrup. Then pour strainer and cool in fridge
Improvements - This was very nice, but I might add some citrus zest while making the simple syrup.
So all you do is add your syrup to your glass. The amount completely depends on your tastes, but I found that around 4 oz for a 12 oz serving was about right. Then go over to your tap and add your carbonated water. Throw in some ice cubes and stir it up with a straw and enjoy.
 Another option which is super easy - is to buy fruit syrups at the store. Our ethnic food stores carry a huge selection. Sour Cherry being one of my favorites - works well in Berliner Weisse, too.
As a sidenote - these also make some great bases for cocktails - just add your spirit of choice.
I'll try to post any new flavor combinations I create (even the bad ones). Please share your experiences also.
This whole process was a lot easier than I thought. The carbonated water is pretty basic, just add filtered water to a keg. I was worried that the carbonation wouldn't be high enough for a soda. My keezer settings are on the high side around 2.75 CO2 volumes (fridge at 40 F, Pressure 15 psi) because of the styles I normally have on tap. And I actually like this level as it not spritzy on your nose, but is still obviously carbonated. If you have a fancy setup then by all means crank up the pressure.

My idea to use syrups to flavor my soda was 3 fold:
1. I am still experimenting with flavor profiles and didn't want to commit to 5 gals of anything
2. With syrups it is much easier to adjust your sweetness or flavor level. I tend to prefer less sweetness than my wife
3. More variety
The syrups are also pretty easy to make. I started by just looking for soda recipes online - I just don't add the water to the recipe. Here are a few to get you started:

Basil Lemonade w Jalapeno (Original Recipe)
 2 parts simple syrup (1 part sugar to 1 part water) - heated to dissolve the sugar with 1 cup of basil leaves and allow to seep with the lid on for 30 minutes
1 part lemon juice
1/2 - 1 jalepeno or any pepper of your choice
Mix everything together and allow to cool in the fridge. Stored mine in mason jars in the keezer.
Improvements: I plan to make extra thick syrup (2 cups sugar to 1 cup water) and therefore you would only need 1 part syrup to juice. This just allows you to make more soda with less syrup.
Honey Cream Soda
 Honey Simple Syrup (1 part honey to 1 part water) - just heat enough to mix without driving off flavor
2 vanilla beans - I bought the variety pack (it's cheap) and Tahitian taste the best so far - more fruity and less extract tasting. I shopped around and Vanilla Products USA had the best selection and deals.
Split the beans and scrap the goodness and put everything into the heated syrup and allow to cool in the fridge.
Improvements: The honey was a bit over the top, so next time I might substitute half the honey for turbinado sugar.
Ginger Ale (Original Recipe -yeast)
 2 cups Simple Syrup
1.5 oz Ginger - Minced or Grated - I used my hand held microplane (like this)
2 Tbls Lemon juice
Take ginger and let it steep for 60 minutes in heated simple syrup. Then pour strainer and cool in fridge
Improvements - This was very nice, but I might add some citrus zest while making the simple syrup.
So all you do is add your syrup to your glass. The amount completely depends on your tastes, but I found that around 4 oz for a 12 oz serving was about right. Then go over to your tap and add your carbonated water. Throw in some ice cubes and stir it up with a straw and enjoy.
 Another option which is super easy - is to buy fruit syrups at the store. Our ethnic food stores carry a huge selection. Sour Cherry being one of my favorites - works well in Berliner Weisse, too.
As a sidenote - these also make some great bases for cocktails - just add your spirit of choice.
I'll try to post any new flavor combinations I create (even the bad ones). Please share your experiences also.