Friday, April 30, 2010

Bridges to Beer Bike Ride

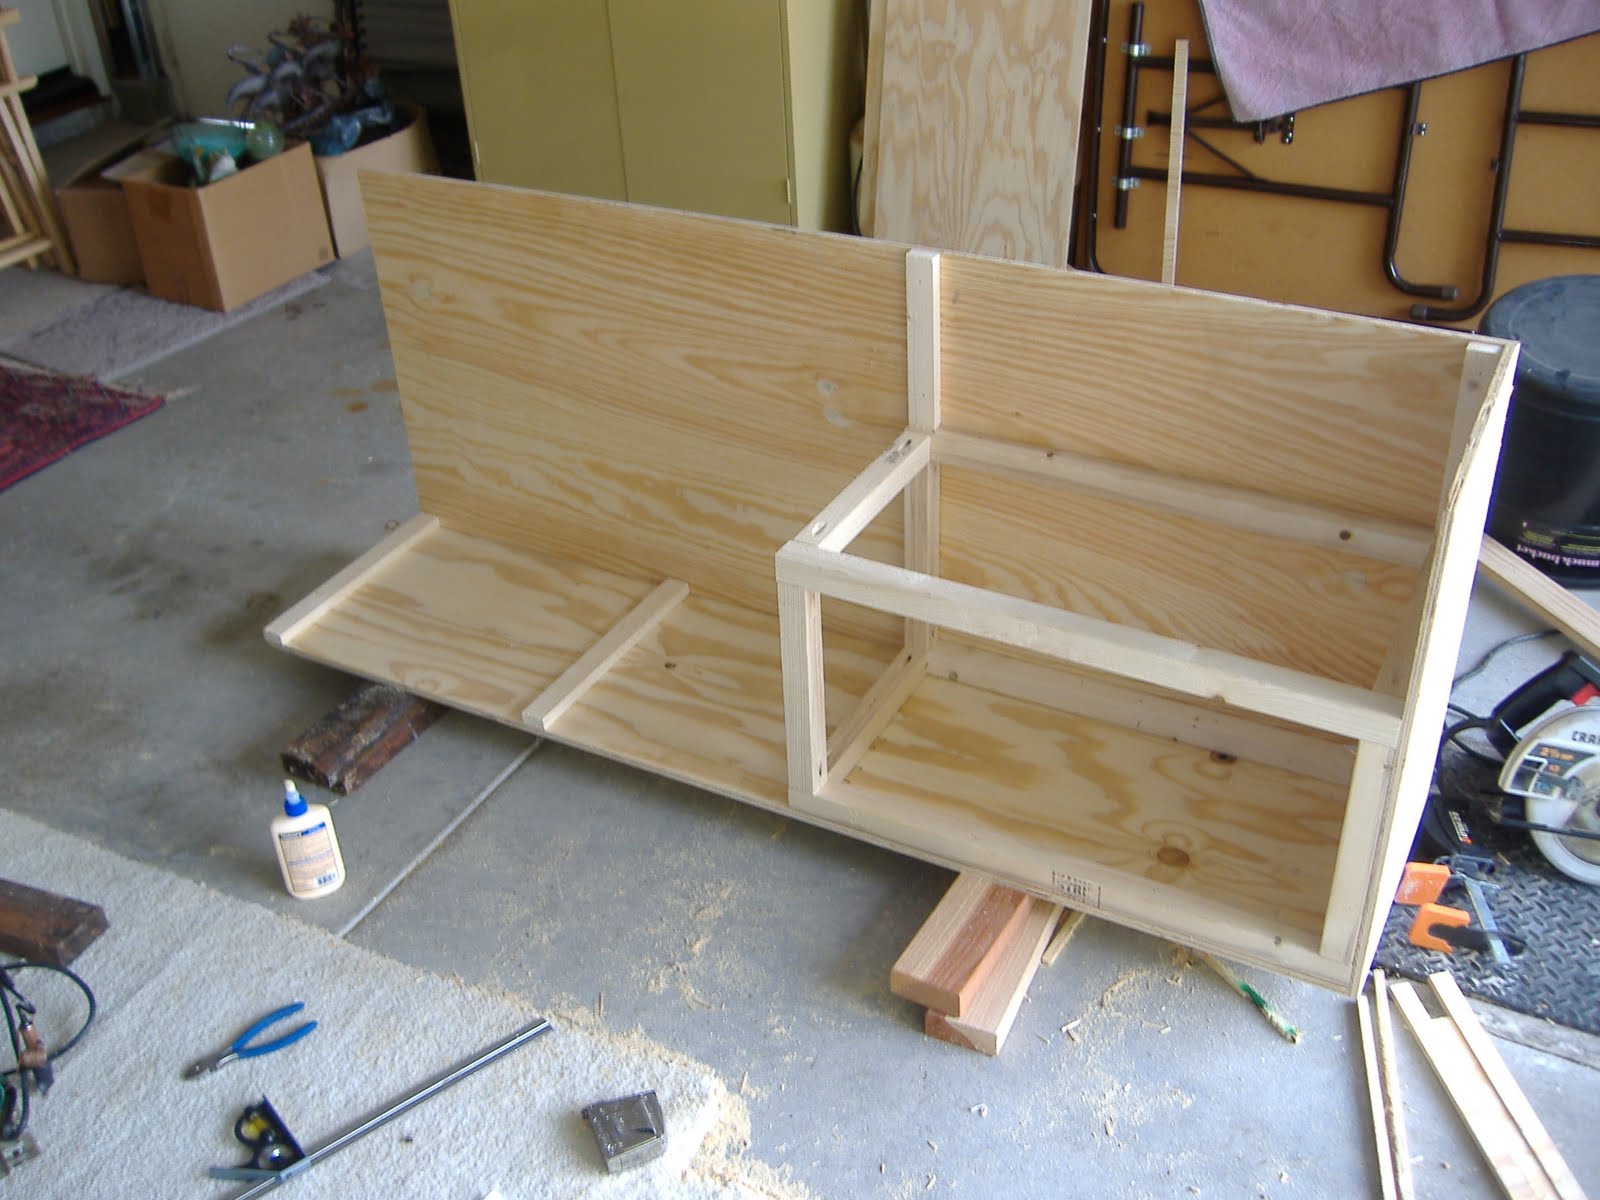
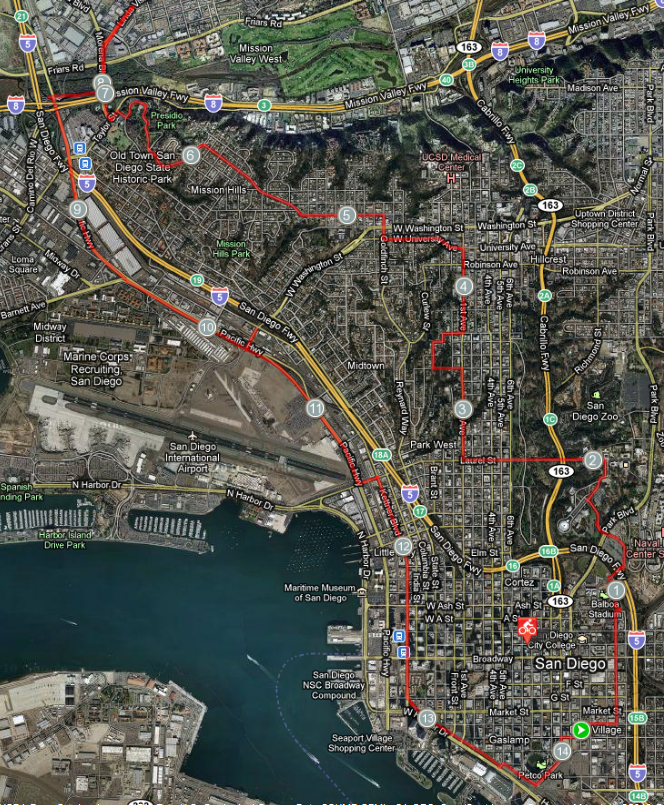
This ride was for fun and well necessity (needed yeast). Check out the map

It didn't seem very far but mostly because it was scenic except for a decent portion of the way back. If When I do the ride this route again. I think I might try going on the bike path along the 8 freeway and see where I end up.
So I started up 16th St which on the map looks like a decent hill but it is not until you hit City College. Then there is a pretty steep hill (you can walk it) up to the pedestrian bridge across the 5 freeway. Crossing the freeway is pretty neat and the view of the city is great.
Then I headed through Balboa Park, easy place to get distracted and that day the March of Dimes walk was taking place (always something). I head past the Museum of Natural History over my 2nd Bridge or as I knew it as a kid "Suicide Bridge". Keep going straight till you hit 1st Ave. and hang a right.

Your next bridge is the newly restored 1st Ave Bridge, great view of the bay.
Keep on 1st then right on Spruce and you will see the entrance to the coolest bridge in San Diego at the dead end.

This suspension bridge is quite amazing and sort of a thrill to ride your bike across. Take and immediate right and then follow the streets and they will finally lead you back out to 1st Ave. Take a left.Then follow 1st for a while and hang a left on University then right on Goldfinch. Cross over Washington and take your first left on Fort Stockton Dr.. This is a cool road to ride on and it will take you for a ways.
Soon you'll be among some big expensive homes, when the street ends go left. This takes you all the way to the top of Old Town Park. A great place for a picnic.
The rest of the ride was pretty boring and not worth detailing. Except I did stop by the Old Mission Brewery building. Nothing is going on there yet but with a bit of research I found out that New English Brewing Company
is going to open there soon.
I also passed by Art Walk in Little Italy which is a pretty big event and ended my journey going down the bike path adjacent to the trolley tracks.

Monday, April 26, 2010

Brewing Equipment: Fermentation Cabinet - Step 2

The next step is to build up the cabinet to to fit the fridge guts into. I have a very specific area where this cabinet will go. Basically my space is 66" tall x 25" wide and 16" deep. This is a pretty small space but it works for my equipment. I have space in the fridge compartment for one 5 gal carboy or 2 - 3 gal Better Bottles. And then there is 2 shelves plus the top so I can fit the rest of my equipment.
I need to buy a temperature control unit for the fridge compartment. I read through Homebrew talk for a while and decided on a Love TSX - 10140.
One way to wire this controller to the fridge is done by the below wiring diagram.

So here are some pictures of the build (a bit blurry)

Still need doors, insulation installed, wiring completed and then finishing and paint.
Step 1 - Fridge Disassemble


Step 3 - Painting and Insulation

Step 4 - Wiring and Organization

Brewing Equipment: Fermentation Cabinet - Step 1

After many hours of internet research I have decided on my plan for my fermentation cabinet. I have reviewed all the different options available to me. I spent quite a few hours on the Homebrew Talk.
I live in a condo in Downtown San Diego so I don't have a ton of room. Plus the wife has limited my beer equipment to the closet in the office. I needed a way to organize all my equipment in the closet so I figured this would be a great time to build myself a temperature controlled fermentation cabinet.
I really liked the cabinets that used the fridge guts. The look clean and seem to be a fun DIY project. One step that many of the fridge gutted cabinets was how to get the guts out. They simply say it was hard but here it is. So I decided to document myself doing the demo.
Here is the first fridge:
I busted this one in 2 places. First I punctured the freezer unit with the Reciprocating saw then I broke the cooper line while trying to pull it out. Any break in the system and you are done. The price to fix it and recharge with new coolant is more expensive and time consuming then starting over. I did salvage a few parts that I may use on another project.
Lessons Learned:
1) Try to find a mini fridge that only the freezer compartment does the cooling
2) Don't use a Recipicating Saw - its just too out of control
3) Be careful and take your time, don't take shortcuts

So I listened to my own advice and found a cheap mini fridge off of Craigslist:

I took my time with this one and used far simplier tools. I cut the outside sheeting off with shears which was very easy. And used the Reciprocating saw blade by hand to cut through insulation or a drywall knife would be perfect. If you have any questions, I feel like an expert now.
Step 2 - Cabinet Build
Step 3 - Painting and Insulation
Step 4 - Wiring and Organization

Scottish 80- (Export) w Oatmeal

Yeah, I need to work on the title. With this beer I'm not necessarily going to far away from the Scottish Ale style. But I really like the malt profile and aroma of this beer style. Plus I really enjoy a good amount of body and a nice thick head on my beer and I have not reached that by just raising my mash temperature. Also with a high mash temperature I don't want this beer to finish too sweet but that shouldn't be a problem with Cal Ale WLP001. So this beer is basically the bigger, thicker brother of my 70- Schilling I brewed last. I made sure to keep the oatmeal around 10% to make sure I will have a good mash runoff.

Recipe: Scottish Ale 80-
O.G.-1.046  F.G.-1.010   IBU-19 
SRM-15   ABV-5.3   Cal-165

Grain Bill (75% Efficiency):
5.5 lb Maris Otter (68.8%)
8 oz Crystal 40L (6.3%)
4 oz Crystal 120L (3.1%) 
8 oz Victory Malt (6.3%)
8 oz Honey Malt (6.3%) 
12 oz Oatmeal (9.4%)

Hops:
.75 oz East Kent Goldings, 5%, pellet, 90 min 13 IBU (100%)

Yeast:
200 mL slurry White Labs WLP001

Brew Day:
Brewed: 04/10/10
Kegged: 4/25/10

Water:
San Diego (Alvarado) Tap Water
1 campden tablet for 5 gal.

Mash Details:
H2O/Grain Ratio: 1.25 qt/lb
Mash Volume: 2.5 gal
Sacc Rest. Temp/Time: 158F @ 60min
Strike Temp: 172F
Batch Sparge Volume: 5.5 gal
Sparge Temp/Time: 170F @ 30min

Boil Details:
Boil Volume: 6.5 gal
Boil Time: 90min
Post Boil Volume: 5 gal

Ferment Details:
O.G.: 1.050
Ferment Temp: 64-68F
Length: 7 days
F.G.: 1.010

Thursday, April 22, 2010

Ash's Huffy Bike Build / Restore

Yes, the title has changed and so has my mind. I started getting into rebuilding the Azuki and figured out there are a lot of things that will make that bike difficult to finish the way Ash would like. So...around the same time I came upon another bike. Now this bike is nothing classic or even that high quality but it will serve my purpose very well. The bike is 1970's Huffy "Sea Pines" (The "Sea Trails" is the male version).
The bike's previous life was a potted plant holder in one crazy yard out in East County. The nice woman let me have it and told me it will have a higher purpose now. I agree. So here are some before pics.

And this is what it looked like in its younger years. It is getting an all new make-over.

Thursday, April 8, 2010

2009 San Diego Brewery Tour - South

So my sister and I always struggle with good gifts for my mom because she doesn't need anymore processions. So we try to find fun events or experiences that we can enjoy with her. Over the years I have been into beer I have corrupted the taste buds of people around me including my mom and sister. Hence our idea for a San Diego Brewery tour. Now there are too many breweries in San Diego to do in one day and they are too spread out. So this first year I started with places that I knew my mom and sister would like and made sure to mix in places with food (key).
I put everything together into a nice packet that we wrapped up for her. Here are some screen shots of the packet. If interested please contact me and I'll send you a word version that you can edit.
Optional: We didn't make it but right in the same path is:
Be Safe

My Current All Grain Brew Setup

This is one of the most basic (read cheap) setups I think you can have. Over time I have gotten used to it and I'm making good beer. I'll explain the purpose of each piece and what went into making it.

Mash Tun:
Home Depot 5 gal Beverage Cooler Conversion - there are several sites that detail how to make these (the best). Or you can buy them new for around $100 (here, here). I went with 5 gal because I don't make very large batches and if I want to upgrade I have all the hardware and can just buy a new cooler. I also choose to use a different design for my manifold. You will see most commonly braided mesh screens used or a false bottom. I really liked the manifolds and was inspired by John Palmer's Book Chapter (available for free). I bent 2 pieces with the tighest curve of the pipe bender which was perfect. Then used a hack saw to make slits and fit everything together. I did not solder any of the copper together to make for easier cleaning. It works well and I get my efficiency at about 75% which I find to be a good mix between flavor and economics.

Kettle:
I use a converted Half Barrel(15.5gal) Sanke keg. I ended up completely cutting off the top of the keg. Most people leave the top handles and use a jig to cut out a hole on the top. But to me this is boil kettle and has no need for handles. By cutting off the top (with a angle grinder) it is much easier to clean, easier to fit my immersion chiller, and allows the needed chemicals to boil off and not return to the boil. The fittings are from Bargain fittings which can't be beat. The holes were drilled with 3/4" hole saw but afterwards I found a step drill bit cheap on ebay. Place these fittings as low as possible. My pickup tube is a little bit different, I originally had just a bent piece of copper tubing from the bulk head but since I am doing a lot of small 3 gal batches so I needed the immersion cooler to sit lower in the pot. So I added in 2 90* elbows and it works great.

Burner:
Bayou Classic SQ-14 it is pretty cheap on Amazon. It is sturdy and fits the keggle perfectly.

Fermenter:
5 gal glass carboy

 5 gal  kegs

  • 1. Sanke Keg top and a 6.5 gal carboy cap stretched over the opening

  • 2. Corny Keg and I remove the gas disconnect and attach 3/4" clear tubing with a SS hose clamp 

Several 1 gal glass carboys for experiments


Fermentation Fridge:
I built my own from scratch. Refer to the Fermentation Chamber.


Racking Method:
I am a new convert over to a Stainless Steel Racking cane (easy to sanitize in wall paper tray and clean with dip tube brush). I also use a sterile filter (mark your "in" side with tape) to start the siphon. To take it one step further I use my paintball CO2 tank to blow CO2 to start the siphon. This system works great as long as you are using carboys.


Related Posts Plugin for WordPress, Blogger...