Monday, June 28, 2010

Dreg Series: Summer Kriek

So you may have noticed, but probably not that my Summer Solstice recipe was a weird volume. So my new plan with every beer I do is to take a 1 gal off and make a fun sour beer. I don't make very many hoppy beers so this goes well with making sours.
Next it is cherry time but in San Diego we really only have sweet cherries available fresh to us. Trust me I searched a lot of produce markets and called even the professional breweries that make a cherry beer. In most krieks they use sour or tart cherries. After my search I was left with a few options:
1. Order tart cherries online and shipped frozen (or juice)
2. Buy canned tarts in water/syrup

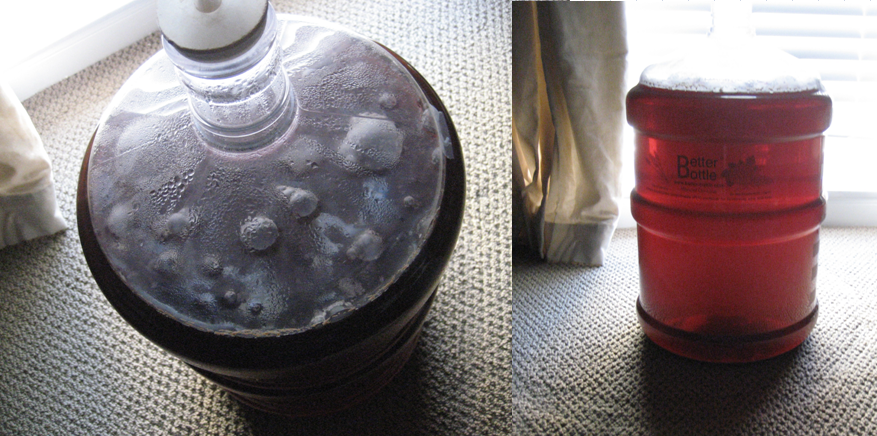
For this little experiment ordering online was far too expensive. So I found some tart cherries in light syrup at a local ethnic market (North Park Produce). Now these cherries are pitted and I have read about the complexity/nuttiness that can be added from the pits. So I decided to also buy some fresh sweet cherries. So I froze the fresh cherries for a few days to break down cell walls. I have decided to do a double dosing of cherries for this beer. The reason for this is to give the dregs some new sugar to start on but then I will also want some fresh cherries flavor also so I will add a month or so before bottling So to start I added .5 lb of the tart cherries and .5 lb of the frozen sweet cherries to a 1 gal container then racked my Summer Solstice beer on top. I put that into the beer fridge at 60 and added the dregs from an Old Beersel Framboise. I'm not sure how well these dregs will do since there didn't seem to be a lot. I will let this go about a month to see if I get any pellicle, if not I have a 750 bottle of Cantillon Kriek (I might add it regardless). So I'll update this entry as we progress.

12/4/10 Update - Added Cantillon dregs

12/11/10 Update - Taste and Aroma are mild cherry. Still very clean, hopefully new dregs will help. The color is great. I will add more tart cherries in a few months.

Thursday, June 24, 2010

Ash's Huffy Bike Build / Restore Step #4

Everything is cleaned (as well as you can clean 40 year old parts) and/or painted. It is time to reassemble, which I consider being the best part. So I am glad I followed my own advice and I took a lot of pictures because I needed them. I decided to start with the head set.

I waited for a week between painting the frame and reassembly to ensure the paint had fully cured. I had a few chips on the paint because I dropped the frame a few times. And to be honest the spray paint is not very durable at all even with 5 or 6 coats. For the next frame I am definitely going to try to use the auto paint out of a paint gun. The head set is pretty easy to assembly just refer to your picture and get everything in the right order. The difficult part comes to knowing how tight to screw each part. Basically you tighten the first nut just hand tight and test the motion of the fork. Once you are satisfied then put on the top nut and crank down. (Make sure to grease all threads.)
Next I slipped the handlebars into the stem and then tightened down everything just till snug. At the end I will go through and tighten before riding. I attached all the brake levers and 3 speed switch.

Then I took apart the bearings on the wheels and cleaned and greased them. This is pretty easy but make sure you know the order of each part you are taking off. For the Shimano 3 speed hub you use oil to lubricate the internal gears. While I had the rear hub apart I dropped a good amount of 10-30W oil in. This seems to really help the hub and it is recommended to add a few drops every couple of months. I had to buy new tubes for the bike but they weren't too hard to find. The tires are 26" x 1 3/8" which was pretty common for this age of bike. I think you can even buy this size tire at Wal-Mart but I suggest supporting your local bike store. So after reassembling the wheels I went to attach the back wheel and noticed the frame was pretty bent. I stuck the dropouts into the vice and gently bent the frame. And this is where I really noticed how easily the paint chips.

Now on to the brakes, luckily I kept everything together so with using my pictures they weren't too hard to put back together. But once together this is where I was stumped. So I know you will need to "toe-in" brake pads but I thought that just came from having the pads worn in a bit. But with help from Tom at the Velo Cult Bike shop (where I got all my parts, very helpful) he enlightened me that I have to actually bend the metal hangers. They have a special tool for this, but I used an adjustable wrench and it worked pretty well. Just tighten the wrench onto the hanger and bend slowly in whatever direction you need to align the pads with the rims. Scary but this is how they were made.
Now on to the cranks, this is also as easy as the headset. Basically just grease everything and put it together in the right order. Then the inner screw is tightened so there is no play (read doesn't move when shaken) but still turns easily. Then tighten down the outer nut, sometimes you will need to loosen the inner nut just a quarter turn before tightening the outer nut.

So I searched forever to find a saddle that was comfy but still went with the style of the bike. The old saddle was way beyond restoration. So I did a good internet search but wither found Brooks saddles or the hidious huge cruiser type saddles. Luckily at Velo Cult they had the old couch style saddle for around $30. That was an easy buy.

Next was to install the fenders. I think fenders look great but are so annoying to install and keep from touching the wheel. They were pretty easy to install with a few screws at each drop out.

Next Post will be on the finishing touches like running cable.

Monday, June 21, 2010

Sour Beer : 2010 Flanders Red

I just realized I forgot to post this when I brewed it. I brewed it at the beginning of April, hoping that it will be ready for my birthday next June. Without a doubt Flanders Red is my favorite style and I think it is one of the more challenging style for the homebrewer. But also one of the most rewarding since to buy these beers they are hard to find and expensive. On the same note it also takes a year to figure out if you wasted all that time.
I did a lot of reading on this subject, here are a few good references:
Jamil Show - Flanders Red Show
Wild Brews Book
Brewboard Discussion
The Mad Fermentalist
I decided to go with Jamil's method and recipe. Then just this past week I added the oak dowel in the stopper method mentioned somewhere in the 35 page discussion on Brewboard. I'll keep posting updates so you can see how this monster changes over time.

Recipe: Flander's Red
O.G.-1.062  F.G.-TBD   IBU-17 
SRM-13   ABV-6.5-7.5%%   Cal-200

Grain Bill (75% Efficiency):
4 lb Vienna Malt (35.6%)
3.5 lb Pilsner  Malt (31.1%)
2.25 lb  Munich Malt 10L (20.0%)
6 oz Aromatic Malt (3.3%)
6 oz Caramunich I (3.3%) 
6 oz Special B (3.3%) 
6 oz White Wheat Malt (3.3%)  

Hops:
.75 oz Golding, 5%, pellet, 90 min 17 IBU
  
Yeast:
1 vial White Labs WLP001 California Ale
1 pack Wyeast Rosealare in secondary

Brew Day:
Brewed: 4/6/10
Kegged: 2011?

Water:
San Diego (Alvarado) Tap Water
1 campden tablet for 5 gal.

Mash Details:
H2O/Grain Ratio: 1.07 qt/lb
Mash Volume: 3 gal
Sacc Rest. Temp/Time: 154F @ 60min
Strike Temp: 171F
Batch Sparge Volume: 5 gal
Sparge Temp/Time: 170F @ 30min

Boil Details:
Boil Volume: 6.5 gal
Boil Time: 90min
Post Boil Volume: 5 gal

Ferment Details:
O.G.: 1.062
Ferment Temp: 65-68F
Length: 10 days in primary
#1 F.G.: 1.020
Moved to Better Bottle and pitched Rosealare. In closet so temperature will change with season. 
7/13/10 Update - This is with a couple weeks of adding the oak dowel
7/21/10 Update - that looked way to nasty so I'm done with the wood and back to a regular stopper.
11/10/10 Update - First Sample - developing nice Flander's characteristic flavors. Just barely tart and low acetic. Can't wait for the Pedio to kick in. 1.009
2/5/11 Update
Gravity - 1.010
This beer is just coming into its own. Nice aroma with some sourness and cherry. The sour in the taste is getting there. It has a touch of sharpness. Added .5 lb of maltodextrin and some Jolly Pumpkin bugs from the Black Jolly Sour   (wtf...the floater(there is a big chunk at the bottom too), I have no idea but I also don't taste a big off flavor from it)
5/4/11 Update
Gravity - 1.010
The smell is just fantastic. It was a sour cherry explosion while racking. Very little funk. But the taste is still lacking and does not live up to the smell. Just barely tart and the malt is a bit muddled. It has some good body though. Lets hope some time in the bottle will help.


 I bottled 3 gals with 110g of corn sugar - hoping around 2.5 Volumes (Tasting)
I transferred one gal into jug on top of 1 lb sour cherries (frozen from last year) (Post to come)
I kegged one gal to drink and adjust with some lactic acid and cherry juice. It was interesting to see how the lactic acid brought out the other flavors, but it was very easy to over do and give a sterile medicinal taste.

Tuesday, June 15, 2010

Session Beer Series: Summer (Solstice) Ale

So I very rarely want to clone a beer. The following beer is not meant to be a clone but I would like a beer that tastes similar. I wanted a refreshing slightly sweet malty beer. The beer that I have based the recipe on is the Anderson Valley Summer Solstice (Cerveza Creme). This was one of the beers that really opened my eyes to craft beer. I tasted it maybe 5 years at the Avila Beer festival (when it was still fun) and it was the only beer that I had multiple tastes of. This beer was made to be drank while you are out in the sun listening to live music.
So this is my first time using a "lager" yeast. The yeast I chose was White Labs California Common strain. So it is really a quasi lager yeast. It ferments relatively high for a lager but relatively cool for an ale. So this is also my first beer to use my new fermentation fridge. So I have the fridge set at 63 with plus 2 degrees of range. The first few days I smelled quite a bit sulphur, which I have heard happens during most lager ferments.


Recipe: Summer (Solstice) Ale
O.G.-1.042  F.G.-1.010   IBU-5 
SRM-10   ABV-3.8   Cal-150

Grain Bill (75% Efficiency):
4.75 lb 2-row (82.6%)
8 oz Crystal 40L (8.7%)
8 oz Crystal 80L (8.7%) 

Hops:
.5 oz Cascade, 5%, pellet, 15 min 4.8 IBU
  
Yeast:
1 vial White Labs WLP810 California Common

Brew Day:
Brewed: 6/5/10
Kegged: TBD

Water:
San Diego (Alvarado) Tap Water
1 campden tablet for 5 gal.

Mash Details:
H2O/Grain Ratio: 1.4 qt/lb
Mash Volume: 2 gal
Sacc Rest. Temp/Time: 150F @ 60min
Strike Temp: 162F
Batch Sparge Volume: 3.55 gal
Sparge Temp/Time: 170F @ 30min

Boil Details:
Boil Volume: 5.25 gal
Boil Time: 90min
Post Boil Volume: 3.75 gal

Ferment Details:
O.G.: 1.041
Ferment Temp: 63-65F
Length: 14 days
F.G.: TBD

07.01.10 Update:  Added Real Vanilla Extract. I dosed it in a glass till I was at a point I like. Then I upscaled for the batch. Except I miscalculated the amount of beer in the keg and this turned into Cream Soda. I will pay better attention next year. Plus I will add half the dose I wanted and taste a day later to make sure my taste buds are fresh.

Friday, June 11, 2010

26th Birthday Pub Crawl : North Park

I love good beer and so do a lot of my friends. And the rest of them were looking for a good reason to drink on a Sunday. We are lucky that a few miles from our house is the community of North Park that has somewhat recently been converted into the good beer bar area of San Diego. So below is a map of our little Sunday stroll. I wanted to add more places but the wife thought that it was excessive and she was right with 6 places we were cooked.
So here is a brief description of each place we went:
Start 2:00 - Sea Rocket Bistro (decent beer list,bit pricy,but unique)
- drank Stone Porter w Amer. Oak on cask(nice), Airdale Dark Smoky (a bit hot for me)
Next Blue Foot Bar - Lounge - (ok beers, and good atmosphere)
- drank New English ESB (nice balance)
Next Linkery - (Great beer, several casks, local food)
- drank Sampler only standout was the Braggot from Craftsmen
Next Toronado - (Best Beer list, but terrible staff (don't smile too loud))
- drank Cantillion Iris (thanks PJ, amazingly complex), Cuvee de Jacobins (might be my favorite Flanders Red)
Lastly Ritual Tavern - (I think my favorite place, great beer and atmosphere)
- drank Nostradamus (super complex dark strong)

So those 5 are all we were able to make it too but the following are a great way to extend the crawl or will probably be the ones we do next year:
Whistle Stop Bar - 2236 Fern St (still need to try)
Station Tavern - 2204 Fern St (still need to try)
Hamiltons Tavern - 1521 30th St (probably my favorite place)
oh and we skipped Urban Solace (a little too fancy for a pub crawl)

Tuesday, June 8, 2010

Brewing Equipment: Fermentation Cabinet - Step 4

So I am not a electronics expert but if someone gives me a diagram of the circuit I can understand it and reproduce it. So lucky for me over at Homebrewtalk.com there are a few experts. And from some extra help from a user named ClaudiusB I was able to get everything wired up. I just used basic wire nuts and the old trusty strippers and was done in 15 - 20 minutes.
Next I had to figure out how to program the thing, which is pretty easy if you can follow directions. ON advice from some forum users, I set my controller to have a 3 degree range, and a 30 minute rest period. The point of this is to reduce the cycling of the compressor as to not wear it out.


So all that was to do was to fill the shelves with brew stuff. No Problem.


Step 1 - Fridge Disassemble

Step 2 - Cabinet Build

Step 3 - Painting and Insulation


Monday, June 7, 2010

Brewing Equipment: Fermentation Cabinet - Step 3

Alright so I have the whole structure built. Now I need to install the doors for the fridge compartment and the insulation. I decided to go very simple here and just use 3" hinges. They are cheap and easy to install. Plus this is going into a closet so I am not terribly worried about the ascetics. Once everything is painted it will look nice enough.


I cut the insulation with a drywall knife which I found to be the easiest. A razor blade wasn't quite thick enough plus it tends to find its own path while cutting. I had very simple measures for my fridge chamber, I need (4) 12"x12"(top and bottom, double thick) and (8) 12" x 24" pieces for the sides. I ended up not needing glue they all press fit in (in the near future I am covering the sides with melamine, just having a tough time sourcing it). For the front door I used contact cement to put the 2 pieces together and then the same to the door. It was pretty easy to line up by just partially closing the door and holding the insulation in place and marking the corners. I then taped off all the edges to prevent the insulation from being destroyed over time.
So now was painting time everything got a coat of primer and then white gloss to blend in with the paint in the closet. Pretty easy job with a mini roller.
Next onto wiring.


Step 1 - Fridge Disassemble

Step 2 - Cabinet Build


Step 4 - Wiring and Organization

Thursday, June 3, 2010

2010 Hop Gardens

So this year, I needed to plant new rhizomes at my mom's house. I decided to try Goldings again because they are one of my favorite English style hops. This year I decided to water more frequently ( 2/day - 5 days/wk for 5 minutes) on the drip system. I also made sure to give the rhizomes a good dose of compost. In San Diego, compost is free at the Miramar landfill. You just show your ID and you can take a couple cubic yards of compost and mulch. The mulch is great for covering the ground around the hops to keep in moisture. Be careful not to cover the rhizomes or near the base of the plant as it may cause mildew. The combination seemed to really help this year as they are taking off. Also after the shoots were about a foot high I cut the bines so I only had 2 shoots. Below will be my updates:
04.26.10
 06.02.10
07.10.10 - Bugs, looks like grasshoppers and spider mites

So not the greatest news at my Dad's house. I can still see the root ball with buds but no action. And it appears the other Cascade did not make it. We recently composted the garden bed and increased the water schedule so maybe it will make a late run.

 9.07.10 Well they made a run. And they were doing really well until... THE SQUIRREL FIGHT 2010. A squirrel got into Dad's garden and as he was trying to get it out he whacked the hop vine in half. The good news is the rhizome for this plant is huge. The reason it was such as slow starter is because it grew under ground for almost 2 feet before sprouting to the surface. So for next year we are going to chop it up a bit and put a barrier around it.

So now I'm going on two years and no hop cones. But I feel like I am getting closer. I already have expansion plans for next year.
Related Posts Plugin for WordPress, Blogger...