
Below is some background and link to the calculator mentioned in my NHC Seminar: How to Brew, Blend and Maintain an Acid Beer . This calculator adds a few features to Mike's (Mad Fermentationist) Blending Priming Calculator.
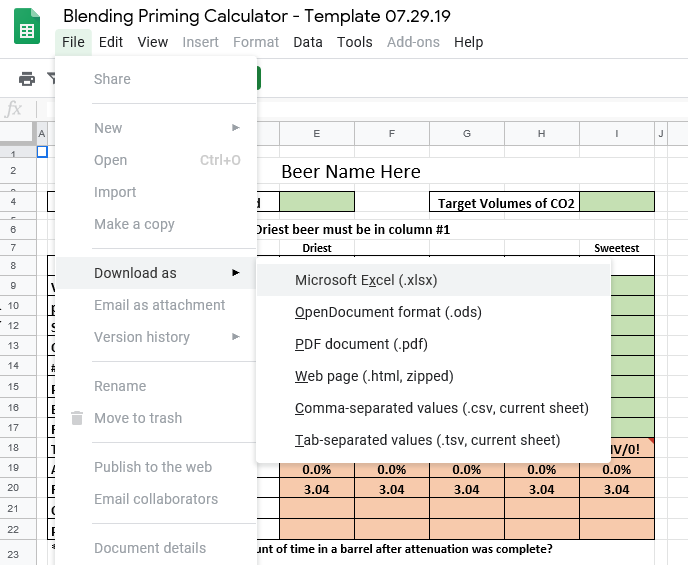
Here is the google doc link - Blending Calculator - pH, ABV and Carbonation (EDIT - Updated 11.13.18 - Do not request edit permission. Go to File -> "Download as"

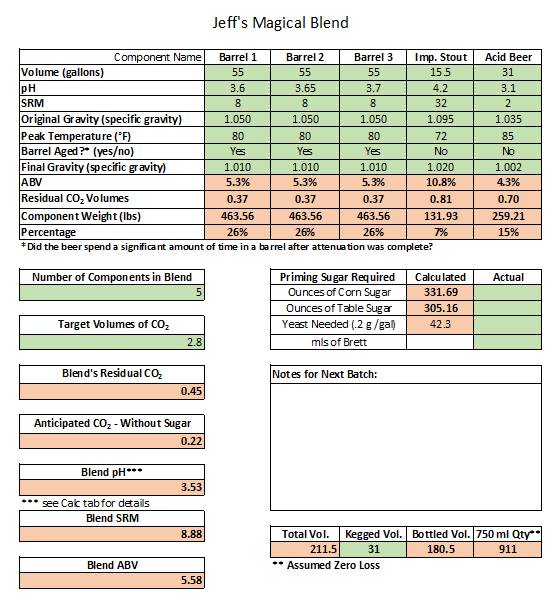
I have made the following changes from Mike's original work:
The calculations have been used and were found to be fairly accurate over the past year of blending and bottling beers at Council Brewing.
P.S. It was great meeting so many of you and thanks for the great support during my talk.
P.S.S. I'm always looking for ways to improve this tool - so please email (Jeffrey.E.Crane at gmail) with comments (or questions)
Here is the google doc link - Blending Calculator - pH, ABV and Carbonation (EDIT - Updated 11.13.18 - Do not request edit permission. Go to File -> "Download as"

I have made the following changes from Mike's original work:
- Formatted this to easily print on one page and act like a batch summary sheet
- Added ABV calcs
- Added component weight feature for blending
- Added pH calcs
- Added priming yeast calcs + Acid Shock Starter
- Added bottle count feature
The calculations have been used and were found to be fairly accurate over the past year of blending and bottling beers at Council Brewing.
P.S. It was great meeting so many of you and thanks for the great support during my talk.
P.S.S. I'm always looking for ways to improve this tool - so please email (Jeffrey.E.Crane at gmail) with comments (or questions)


