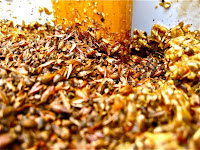
 This brew day was my first attempt at a quasi-partigyle brew. (I was excited to use my new 10 gal mash tun and brew with my 2 good friends, Ben and Dan) Let me explain my process and why I chose to go this way, in hindsight it didn't work all that well.
- Mash all the grains at once with a grist that is for an Imperial Oatmeal Stout
- Collect the first 2 gals into a separate pot. Measure and reduce to 1 gal.
- Sparge until collected 10 gal in main boil kettle
- Add 2.25 oz Horizon to bitter 10 gals to 42 IBUs
- @ 60 min (Volume 9 gal) - Rack 3.5 gal of wort to chilled keg (w 1.5 gal water)
- Boil Remaining 5.5 gal
- Add 1 oz Horizon to bitter to 98 IBUs
- @ 120 min Rack 4 gals into carboy
My calculations are above. I think I chose to go this method mostly for the mental challenge of working out the procedure. In hindsight, it would have been a lot easier and probably more accurate to just do 2 boils.
 One of the big issues with this method is sufficiently cooling the 3.5 gals for the Oatmeal Stout. In the excitement of the day, I just racked the beer straight into the 5 gal corny keg. The corny keg was already filled with 1.5 of cool water. I put this all in a water bath, then ice bath. It did not cool very quickly. If I ever try to do this again, I will rack the 3.5 gals to another pot (easily fit in my old extract stove-top pot) and use the wort chiller in there. Next, I will just buy a couple of gallon water jugs and have them in the fridge. Or I need a counter flow wort chiller.
The other big issue is that I didn't use my hop bag, so there were a lot of hops in the boil. All the trub and hops were racked right into the keg. If there is a next time, I will either use a hop bag or better finally get a good filter for my pick-up tube.
The positive parts about this method is that I saved some extra time to chill (because I use an immersion chiller). I also got more kettle carmelization flavor and minimal better hop utilization for the Imperial Stout.
 O.G.- OS - 1.052 RIS - 1.096 F.G.- OS - 1.010 RIS - 1.028
 IBU - OS - 30 RIS - 78 SRM-35 Batch - OS -5 gal RIS -5 gal
Grain Bill (77% Efficiency):
21 lb Maris Otter
2 lb Flaked Oats
1.5 lb Chocolate malt - 350L
1.5 lb Biscuit Malt
1 lb UK Crystal ~77L
1 lb Roasted Barley
 Hops:
Hops:
2 oz Horizon, 9.1%, pellet, 120 min
1 oz Horizon, 9.1%, pellet, 60 min
Yeast:
300 mL of Wyeast 1469-PC West Yorkshire Ale Yeast - 1 Liter Starter (1/2 in each)
1 vial of White Labs 001 - Cal Ale Yeast - 1 Liter Starter (all in RIS)
 Hops:
Hops:2 oz Horizon, 9.1%, pellet, 120 min
1 oz Horizon, 9.1%, pellet, 60 min
Yeast:
300 mL of Wyeast 1469-PC West Yorkshire Ale Yeast - 1 Liter Starter (1/2 in each)
1 vial of White Labs 001 - Cal Ale Yeast - 1 Liter Starter (all in RIS)
Brew Day:
Water:
San Diego (Alvarado) Tap Water
1 campden tablet per 5 gal.
Mash Details:
H2O/Grain Ratio: 1 qt/lb
Mash Volume: 7 gal
Sacc Rest. Temp/Time: 154F @ 60min
Boil Details:
Boil Volume: 10 gal
Boil Time: OS - 60min, RIS - 120 min
Post Boil Volume: 10 gal
Ferment Details:
Ferment Temp: OS - Held ~ 68F, RIS - Started at 65, ramped to 68 over 3 days
 On Day 4, I added the 1 gal of reduced first runnings to the 4 gals of RIS. To keep the wort, I poured the boiling wort into a pre-heated 1 gal growler. I left the lid loose for a few hours and then tightened and put into the fridge. I tasted it before adding and it was still syrupy sweet and no off-flavors. I don't know how much could live in 1.220 wort. The fermentation stayed active for about a 10 days.


