Thursday, May 26, 2011

Experimental Beer: Ancho Chile Saison

This is my first ever chile beer that I have brewed. And I only made a small 1 gal batch with it. I got this idea from Jeff B at 1227 Brewing and his Ancho Amber Ale. I am a big fan of the flavor from smoked peppers and I thought it would fit nicely into my idea for a San Diego/Mexican  centric beer.

The only commercial examples that I am familar with was series of Chile Beers that Ballast Point made. These beers were more geared toward tasting menus and not as an everyday drinker. And the ones I tried were hot and spicy. It was a strange spiciness, your first sip was normal beer flavor then intense heat to your cheeks and tongue, finishing with the carbonation to help you recover. To be honest I was not a fan. But I am also the person that eats Mild Salsa or if I'm looking to party I'll step up to Medium. I just often think that spicy heat ruins the flavor of most foods. But I know there are people out there that just love there fix of Flame Thrower or Butt Twister.


Obviously, from my commentary above I am looking for smoked Chile flavor without the kick. Jeff B had success with "dry-Chiling" his beer after fermentation. The seeds and stems were removed to decrease the amount of Capsaicin that makes it into the beer (According to wiki - "Capsaicin is present in the placental tissue (which holds the seeds), the internal membranes .. the seeds themselves do not produce any capsaicin, although the highest concentration of capsaicin can be found in the white pith around the seeds"). This is one way to reduce the amount of spice/heat in your beer, the other way is to choose a Chile that is low in capsaicin. See below for two good resources that Jeff B recommended.


http://www.foodsubs.com/Chiledry.html
http://www.foodandwine.com/articles/chiles-kennedy/sidebars/4

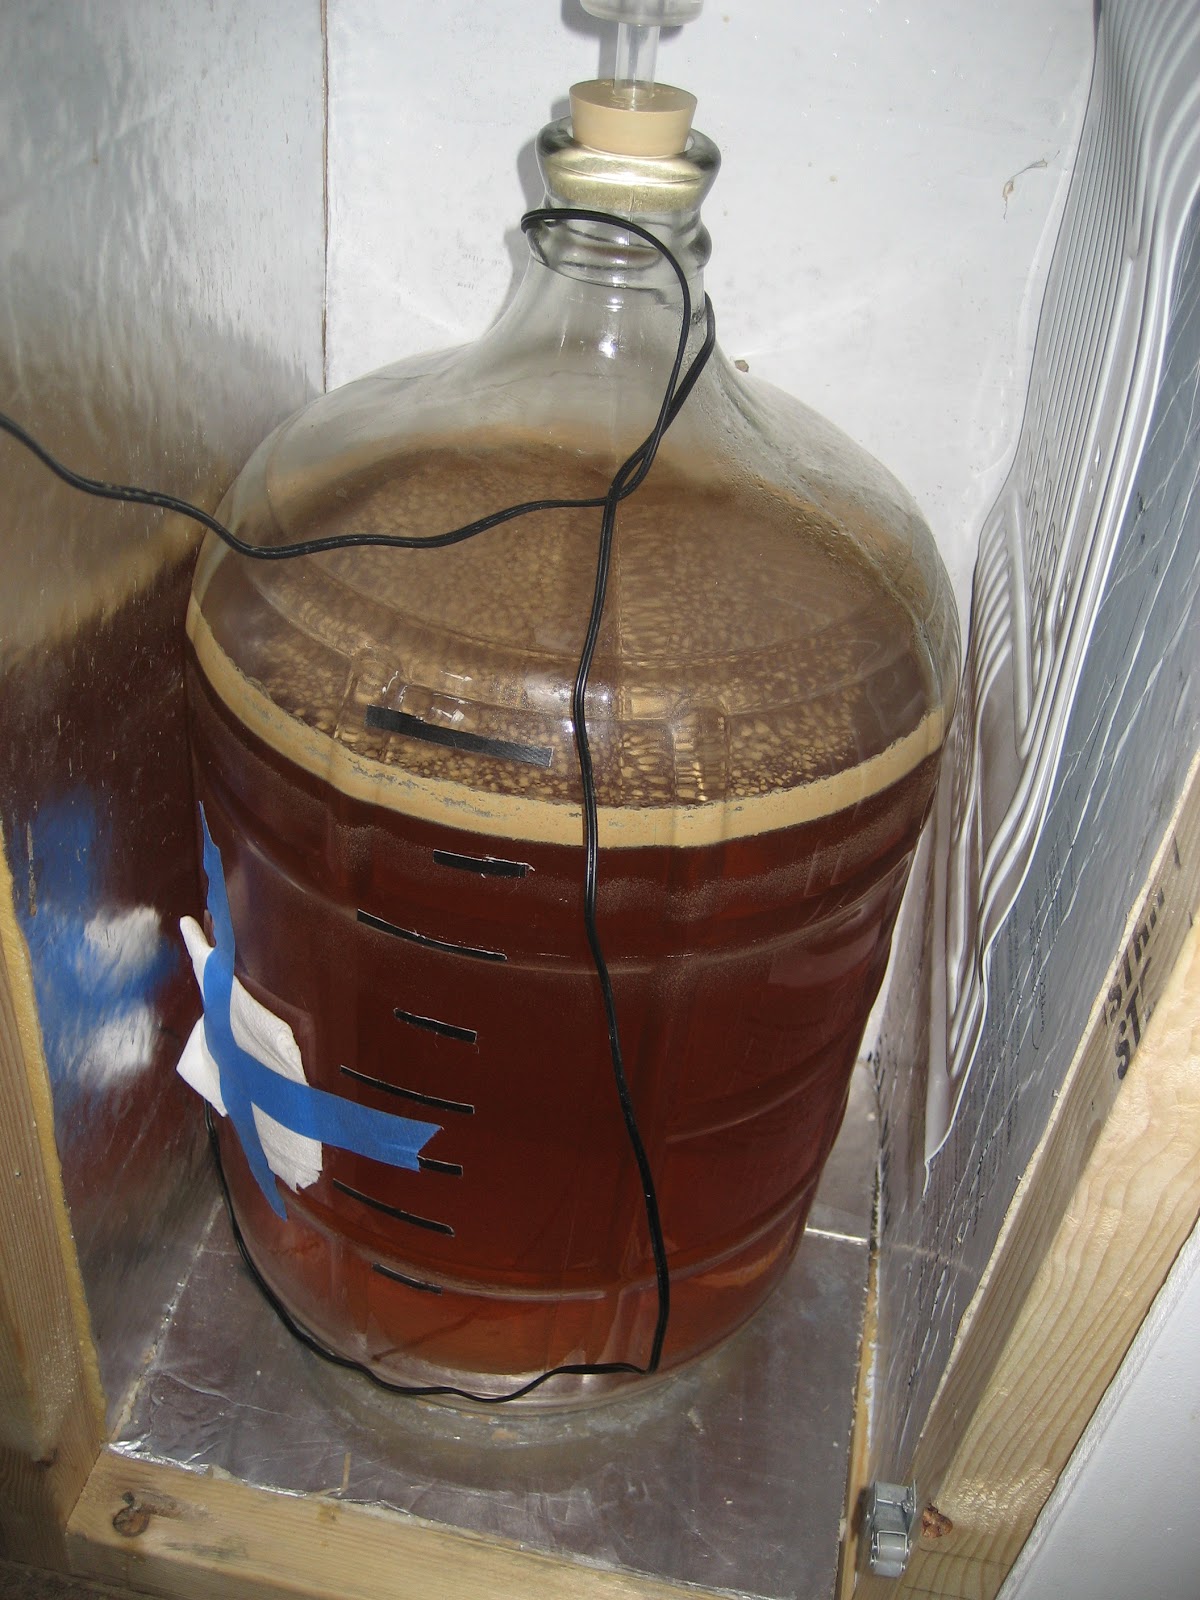
I decided on Ancho Chiles partly because Jeff B had good success plus I liked the explanation on their flavor. In the future I may try a few different varieties. The Ancho chile was just put in the keg and a gallon of wort was racked on top. The beer was kept cold at 42F and carbonated. I tasted the beer every 2 days until I was really happy with the flavor. The flavor was right where I liked it around Day 10. It was then bottled and should be ready for a tasting soon.


Thursday, May 19, 2011

Session Series: San Diego Session Saison

The idea for this beer came to me at the Stone Brewing AHA Rally a couple of months ago. It was a warm day and we were consuming a good amount of beverages and a lot of those beers were just big beers. I am very much a weather or situational drinker. (Just like I think it is gross for people to drink Milk at breakfast, it's a dinner drink). For me when the weather is warm I want a dry beer with a decent amount of carbonation. It needs to be thrist quenching. Which I completely associate with Belgian Saisons. They hit you with all this great flavor, but the best ones are nice and dry so they don't stay on your tongue too long and the high carbonation flushes your mouth for the next gulp.


With that thought in mind, I wanted to tailor this beer to have local influences. Considering I live 20 miles from the Mexican border. I thought I would try to use some traditional Mexican ingredients. The difficult part with this is trying to translate food flavors to beer flavors and still maintain the light refreshing beverage I was hoping for. I started thinking of some of my favorite Mexican dishes, like Mole, Chile Verde and fresh Tamales. A Mole beer sounds pretty amazing actually, but I don't see that relating well to a session style (For my Dark Saison coming up, this may work out nicely). The next one that hit me was the maize from the Tamales. As a brewer I can easily use flaked corn (though I may try maize next time), Plus the flaked corn will really help to lighten the body and help me achieve that easy drinking, warm weather beer. A few other ingredients I will experiment with in small secondary batches include Ancho chiles (Jeff B's idea at 1227 Brewing), cilantro, and  lime only seems logical.


Saisons also traditionally have some simple sugars added to help them dry out. I probably don't need to add the simple sugar because this beer should dry out due to the yeast I selected (Wyeast 3711). But for this beer the sugar addition will allow me to add another traditional Mexican ingredient and another layer of flavor. I will be using piloncillo, which is basically mexican brown sugar and is used in traditional beverages like tepache.


The final decision for this beer comes down to yeast selection. I think more than any other style the yeast for a Saison is crucial. The flavors for this style are almost all yeast driven. I did a fair amount of reading on BabbleBelt about Saisons. I finally decided on the Wyeast 3711: French Saison it got some great reviews, finished quickly and only needed to be brewed in the 70s. The temperature was a big key on this one because I am doing my first 10 gal batch. The larger batch meant I needed another fermenter so I am trying another first, fermenting in a keg (it worked great and I might be a convert once I have a bigger fridge).


Recipe: San Diego Session Saison
O.G.-1.044  F.G.-1.006   IBU-21 Size -10 gal
SRM-3   ABV-4.8%  

Grain Bill (76% Efficiency):
12 lb Belgian Pilsner (80%)
2 lbs Flaked Corn (13%)
1 lb Piloncillo Sugar (7%) - added to Boil


Hops:
.8 oz Amarillo, 9.5%, pellet, 60 min, 17.6 IBU
2 oz Saaz, 3.2%, pellet, 10 min 3.2 IBU

Yeast:
Made 1.5 L starter divided equally of Wyeast 3711: French Saison

Brew Day:
Brewed: 4/3/11
Kegged: 4/16/11

Water:
San Diego (Alvarado) Tap Water
1 campden tablet for 5 gal.

Mash Details:
H2O/Grain Ratio: 1 qt/lb
Mash Volume: 3.5 gal
Sacc Rest. Temp/Time: 148F @ 60min
Strike Temp: 161F
Sparge Volume: 9 gal
Sparge Temp/Time: 170F

Boil Details:
Boil Volume: 11 gal
Boil Time: 60min
Post Boil Volume: 10 gal

Ferment Details:
O.G.: 1.044
Ferment Temp: 65-67F(carboy version)
Ferment Temp: 72-76F (keg version)
Primary Length: 10 days

This yeast performed just like all the reports I read. It took off quite quickly and it appeared most of the fermentation was done in a few days. I didn't measure the gravity at that time. The keg fermented version was transferred, force carbonated and drank at my friend's bachelor party all within 2 weeks of being brewed.

I will follow-up with a side by side tasting of the 2 versions.


Tasting 6-6-11

Wednesday, May 18, 2011

Fiore Tandem Part 3: Assemble & Ride

It's done and with a pretty quick turnaround. Well, that's because I didn't have to do much. The hardest part of bike restoration is finding parts. And for this bike it wasn't difficult because we were not trying to keep it original. I really like how the bike turned out. And so were Meagan and Dan (look at those smiles).


The most difficult part of this bike was adjusting the brakes. For this style of pull brakes, you basically have to do a guess and check method. I first start out by holding the calipers against the rim. Then with the other hand I slide the nut up the brake line until it is tight. Maybe the picture will help.


For most of these bike repairs the Park Tools website is unbeatable and the best part it's free. I think its very important for people to know how their bikes work and are able to fix them. If not, go support your local bike shop.


Have a great Bike to Work Week.


Step 1 - Dissemble & Document

Step 2 - Cleaning & Ordering Parts

Monday, May 16, 2011

Experimental Beer: Native Plant Gruit Ale

Let me first start out like I used to for all my essays in Middle School.
"Gruit (sometimes grut) is an old-fashioned herb mixture used for bittering and flavoring beer, popular before the extensive use of hops. Gruit or grut ale may also refer to the beverage produced using gruit." - Wikipedia


I was first interested in these beers after reading one of my native plant books. I now have a hard time going for a ride or hike without stopping to see what plants could be used in beer. The first step was to test these native plants using a tea which I did last Fall. I have picked the best candidates from that tasting plus I used plants and herbs that have been used traditionally in gruits. The most important one to find for the base of the gruit was Douglas Mugwort. It is used as the main bittering component and a traditional herb that is native to San Diego. The plant is pretty distinct looking because of the leaves (There are 2 main varieties of Mugwort and in San Diego we have Artemisia douglasiana)  and is found near wet or dry creek beds.


From my tasting, my other favorite was Yarrow (also a traditional gruit ingredient), I did not find a lot this past year so it will be a minor ingredient. For the aromatics, I really liked Elderberry Flowers (also currently blooming and have a more subtle floral tea aroma/taste) and Pearly Everlasting (currently blooming in San Diego and have a very sweet floral scent, some even think they smell of maple syrup)


So now that I have figured out what herbs and plans to use, I need to know a rough estimate of quantities. The easiest way to do this is to reference other gruit recipes. The website, grutiale.com is by far the best reference for gruit I have found. The site has information on history, ingredients and a great list of recipes. I went through the long list of gruit recipes and came up with the values used in the recipe below.

For the malt bill, the timing of this brew was no accident I planned to use the second runnings from my Scottish Wee Heavy. This beer is going to be a 1 gal bonus batch using the partigyle process. I used the second runnings to collect 2 gallons and then this will be boiled down to the gravity that I want. The Scottish grain bill is appropriate because historically that is where this style was brewed.

Recipe: Native Plant Gruit Ale
O.G.-1.055  F.G.-1.012   IBU-????? 
SRM-??   ABV-5.5% 

Grain Bill (77% Efficiency):
Wee Heavy Malt Bill (used 2nd Runnings)
12.5 lb Maris Otter (83%)
8 oz Flaked Oats (3%)
8 oz Munich 10L (3%)
8 oz Crystal 55L (3%)
8 oz Honey Malt (3%) 
4 oz Crystal 115L (1.5%) 
4 oz Brown Malt (1.5%)

Hops Bittering Additions:
.2 oz Douglas Mugwort, 60 min
.05 oz Yarrow, 60 min
1 g Pearly Everlasting, Flame-out
2 g Elderberry Flower, Flame-out

Yeast:
50 mL pitch of White Labs WLP028

Brew Day:
Brewed: 03/19/11
Bottled: 04/11/11

Water:
San Diego (Alvarado) Tap Water
1 campden tablet for 5 gal.

Mash Details:
Wee Heavy (used 2nd Runnings)
H2O/Grain Ratio: .9 qt/lb
Mash Volume: 3.5 gal
Sacc Rest. Temp/Time: 154F @ 60min
Strike Temp: 168F
Sparge Volume: 5.5 gal
Sparge Temp/Time: 168F


Boil Details:
Boil Volume: 2 gal

Boil Time: 60min
Post Boil Volume: 1 gal

Ferment Details:
O.G.: 1.055
Ferment Temp: 66-68F
Length: 10 days
F.G.: 1.012

Notes:
  • After tasting(coming soon) I will need to adjust bittering quantities
  • Try to work in a more blended gruit by also adding Labrador Tea and some varieties of Sage.
  • I think I will boost the gravity so the beer may age a bit better

Wednesday, May 4, 2011

2011 Hop Gardens

It's growing...
I have added another garden this year. Our good friend's Dan and Meagan have agreed to grow some hops for me this year. He even started a webpage called Hoppy House which will have a lot more pictures and updates on growing hops at home. Dan is a big fan of American hoppy beers and coincidentally a fellow QUAFF member and beer blogger at Chillidamos, Sean was just digging up a few of his "C" hops. Sean has a pretty serious hop farm with about 30 plants and this year he was adding a few new kinds. He was kind enough to give me rhizomes and crowns (the original rhizome that propagates more rhizomes) of Magnum (Hallertauer), Centennial and Chinook. As evident on Sean's website the Chinook and Centennial really like Southern California and produce well.


This year I will have the following hops growing (click the names to see Freshops website which has great details on every hop):
Cascade - Dad's
Centennial - Dan & Meagan's
Chinook - Dan & Meagan's
Goldings - Mom's
Magnum (Hallertauer) - Dan & Meagan's
Halfway through the season I should be getting a few more rare and vintage hop varieties.


Dad's House:
Third Year Cascade plant. This meant that we had to chop a few rhizomes. We gently dug all around the plant, then each rhizome and chopped them off at the crown. Since this is growing in a raised bed we made a border to make sure the hops don't take over the whole garden. I believe we cut off 5 healthy rhizomes.

Cascade 05.03.11


06.28.11 - The big crown just is not producing. I had high hopes for this hop. It must be putting energy into more rhizomes. It is only about 6" tall.


Mom's House:
It looks like only 1 of the 2 Goldings planted last year is going to make it. I really have not had success with English varieties, but I want to keep trying since I use a lot in my homebrewing.
Goldings 04.28.11


06.28.11 - Not much to report , never took off still just a couple inches high. I think I will transplant to a shady spot.

07.25.11 - I went to transplant this hop and I found out why I haven't had much success at my mom's house. The neighbor's giant succulent prefers the soil and watering that I give my hops. The rhizome had one tap root that was an 1/8" thick but went down over 3 ft before I broke it off. It was trying so hard to make it. So next year I need to dig the whole area up and make a new retaining wall.


Dan and Meagan's House:
All three hop varieties (Chinook, Magnum, Centennial) were transplanted from a hop crown. So they are very healthy. Also we decided to plant them in 20" planters. We used 50% potting soil and 50% compost (free from the San Diego Landfill). We installed eyelets into the roof awning and ran both twine and nylon twine down to each plant. We made sure to leave an additional length of wire so during the harvest we can raise and lower the bine. Check Hoppy House for more current updates.
Centennial 05.01.11


06.28.11 - Growth was going great till 2 weeks ago. And leaves are starting to turn yellow. Need to figure out cause.


08.11.11 These guys came back to life. And all they really needed was some good organic fertilizer (Dr. Benson's Natural Mix). The experts over at Homebrewtalk really helped. Within a week it became dark green again and starting growing again. But we did miss a good 3-4 weeks of prime growing so I doubt we will get a harvest on these first year plants. But we learned a lot for next year.


Magnum 05.01.11


06.28.11 - Also stopped growing, but not as much yellowing.


08.11.11 - Read above for description of what we did. But after fertilizer this hop just started putting out side arms like crazy. We were excited that we might get a bunch of hops. Even though the side arms are about 24" long there are no cones


Chinook 05.01.11


06.28.11 - This guy took off with 3 healthy bines, but has also slowed. We need help.


08.11.11
We have hop cones! OK, there are only about 20 which probably less than an ounce, but it is exciting to us. For some reason only the side arms up at the top of the house (more sun) sprouted cones.


08.26.11 We picked them, just over an ounce. They smell of big time grapefruit, very nice.  Enjoy the Photo Collage.

Monday, May 2, 2011

Fiore Tandem Part 2: Cleaning & Ordering Parts


I'm trying to get a quick-turn around on this bike so Dan and Meagan can enjoy this bike while the weather is so nice. I ordered the following parts:


Chain - measure your cassette and chain ring widths to figure out the size of chain you need. There are 2 common sizes (3/32" and 1/8"). Just take a ruler and measure the inside width. A 1/8" chain is wider than a 3/32" so it will fit on a 3/32" crank but will be nosier and will probably not work with a derailleur. It is best to stick with the same size throughout your whole drive train. The other major option with chains is buying a single speed or multi-speed chain. The difference for these chains is in the construction, multi-speed chains are made to allow the chain to transfer from gear to gear. The do this by having beveled edges and more flex in the links. If you are doing a single speed or fixed gear conversion (like me) they also make 3/32" for single gears, but they are a bit harder to find.

Saddles - Riding tandems are all about style in my opinion. I think it is very important for both riders to match. So I got them so remakes of some retro mattress spring seats. I really like the look of these saddles (also on Ash's Huffy rebuild) and they are the right price, ~$15 each.

Handlebar Grips - to keep the matching theme going, plus the style of grips they had on there get kind of sticky with age. More remakes of retro style handle bar grips. With combined shipping only $6 a pair.

All the other parts on the bike just needed some good cleaning. The good news was the rust on this bike was pretty fresh so it was pretty easy to clean. For this job I just used 0000 steel wool, PB Blaster penetrating oil and elbow grease. For a few spots that were very stubborn I used the Stainless Steel brush. Then the whole bike gets cleaned with Pledge ( I read about this one in Bicycling magazine, it leaves a protective finish).
The last thing, I told Dan and Meagan that since they live in North Park. They will make their money back from this bike restore in no time thanks to the discounts from SD Bike Commuter.

Step 1 - Dissemble & Document


Step 3 - Assemble & Ride
Related Posts Plugin for WordPress, Blogger...