Thursday, July 29, 2010

Adventure Race #2: 24 Hour Black Mountain Race

So this is an old race report but I decided I should post it for a couple reasons. 1. If anyone is ever interested in trying to retrace our steps and the real reason 2. To inspire me to get back training.
This race was another race put on by Equinox Racing Team. And their race report can be found here. If you look all the way at the bottom you'll see Team Kabooze and see we weren't the first to quit but we still only last a bit over 8 hours.
Well the real reason we only lasted 8 hours was because we were badly prepared and we kinda knew that we weren't going to make it the full 24 hours.(Maybe next time).
So we had some great luck and San Diego decided to use one of its 30 rain days of the year. It was fine as we started because it was only a mist but it picked up throughout the day and made everything much more difficult. They also had to cancel the kayak portion of the race due to the weather so we started out with a good jog by the beach. It started out well, meaning we weren't immediately in last place.
We got back to the start point which was near Torrey Pines State Beach and then we took off on our bikes toward Black Mountain. We followed the 56 all the way out. We got to the next transition point and started the trekking portion.
PJ needed to lighten his load and as a group we needed to live up to our team name. So out came the tallboy of refreshing nectar and some slimjims and bananas. What do you typically eat during an adventure race?
Almost immedietely after starting the trekking it started raining much harder. In my defense I imformed both of my teammates of the weather and the scope of the adventure race. Neither of them decided to bring anything waterproof and PJ was wearing Vans slip-ons (but they were camo-style). So PJ's solution to the waterproof jacket was a flannel and some garbage bags. And CJ had a windbreaker. Well as soon as it started raining they whipped out the garbage bags and realized they were for waste baskets.
So from this point on these guys were pretty sad and very wet. We kept trucking on and made our way up, down and around Black Mountain. We did stop at an Elementary school for a bit of lunch and to ensure we were in last place. It was a big emotional boost to get out of the rain for a bit.
We finally made it back to transition but we were done. Well not really we had to ride back to Torrey Pines where our car was. That was a fun, dark ride. The quote of the race came about then, PJ (6'4" - 260 lb rugby player) - "I am going to shivvvvvvver right off my bike".
All was good when we drove up the coast to have a few beers and burritos at Las Olas

Monday, July 26, 2010

Cider Series: California Common Yeast

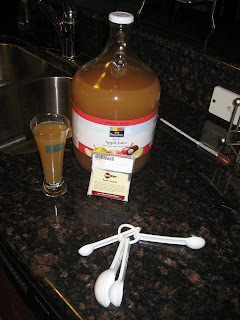
So I decided to do a little experiment with some cider. So I have been buying the 1 gallon cider containers so that I can use them to do my experimental sour beers.
I had a friend come over and ask me what I was doing with the cider. I was trying to just drink the container but I got pretty tired of the cider after about a 1/2 gal. So he was asking me about making hard cider. And I guess it never occured to me how easy it would be to make that cider into hard cider. So I have decided that whatever yeast I have on hand I will pitch some into my 1 gallon of cider. This way I can test different yeasts and how they affect the taste of the cider.
I added 1 tsp of pectin (I like clear cider). I used a 100 ml of California Common yeast and fermented the batch for 2 weeks at 62-65. The gravity for the beer dropped to 1.000. It had only a small amount of apple flavor left but was pretty clean. I am a fan of semi sweet and my wife likes sweet cider. So what I did was I racked the cider into a 2.5 gal keg. I carbed it over a week to around 2.5 volumes (might go higher next time). And then I decided to bottle the cider but I would first add fresh sweet cider to the bottles.

(5) bottles with 2 oz of 1.055 cider - cider should have F.G. 1.009
(5) bottles with 3 oz of 1.055 cider - cider should have F.G. 1.014

I made sure that these stayed in the fridge because they will still have some yeast left in them. They will want to ferment but hopefully with fridge temps the yeast will stay dormant to keep the sweetness. I have heard that cider can improve also with a bit of lagering. So I will taste one of each cider in a couple months. About the time it is nice and hot and the cider is begging to be drank.

10/20/10 Update - They have been kept in cold storage and I really like the bottles with 2 oz of cider. The 3 oz cider is just a bit too sweet and both have enough apple flavor.

Friday, July 23, 2010

Stone Sour Fest 2010

Let me tell you as soon as I heard about this event I went crazy. It is the largest sour beer festival in the world and its a 30 min drive from our house. And at $40 bucks for 15 - 3 oz tastes that is a great deal considering the actual money you would spend to taste these beers. Check out the website. I also have my program that shows all the beers. (80-90 beers and 50+ on draft)
I am fairly new to sour beers. I actually have a nice story how I learned about them.
TANGENT It was an overcast day as it usually is in Bruges, Belgium. My then fiance and I were riding bikes from the city center on a mission to make it to the ocean. We made a few stops along the way and of course I never brought a map. I thought it was only about an hour ride or less to get there. (Ok while riding this it just occured to me to look it up. map. We were so close, if only I brought a map. And I even just found the place we ate on the map. And looking through pictures I found the place. ( De Palingpot )) So I was on a mission to order new beers while I was there and I had never heard of Rodenbach at the time. So I went for it. And talk about thrist quenching after a bike ride. I flipped out, I had never tasted anything like that before. I finished that glass in no time and it paired so well with the nice hot fries and mayo we were eating. It is one of my favorite memories from the trip and all because of that beer.
The reason for the above story is to preface that I am pretty new to sour beers. And I am also learning a lot about tasting beers. I plan next year to start my BJCP classes. I have read books and tried to learn how to taste beers. I can do pretty well when I open a bottle at home and really take my time with it. But a festival to me, is a completely different animal. I have a difficulty really searching for different flavors so I basically just get a nice overall impression of the beer. The beer has 3 oz to tell me to search this beer out and buy it, so I can enjoy it more thoroughly.
Another quick note that I learned at this festival is that for this style of beer (and most) other people's opinions don't mean that I'll like the beer. I tried some very big "celebrity" beers and they weren't my favorite. For example, the beer I was very excited about and have debated buying a $60 bottle of, was just a blast in the face and was too much for me. I'm talking about Cuvee de Tomme, I could tell it was excellently made and had all the flavors that people talk about. And it was super complex and each flavor had its own time to shine on your tongue. But for me, I would love it if it was a 6-7% beer but at 12% it's harsh on my taste buds.
So for me the beers that stood out:
The Bruery Melange #7 - The after taste of this beer is what won me over, it had the most amazing oak complexity and filled your mouth with coconut and vanilla for a while after drinking. Description: Cuvee Jeune, our young lambic (now older) and blends it with a special beer we made with Pinot Noir Grapes. Similar to White Zin.
New Belgium Tart Lychee - Talk about refreshing, this was tasted mid-day when it was pushing 90 degrees and it hit the spot. Description: Three year wild (oak barrel acidified with souring bacteria and Brett) beer blended with lychee and Ceylon cinnamon.
Other Notable Favorites of the day were : Veritas 007(amazing sour complexity), Avery Alter Boy (great Brett flavors), New Belgium Love (Both the dry-hopped and spiced versions blew me away, new tastes with sour), Birra del Borgo Duchessic (Cantillion gueze blended with a blond, pretty much the ultimate lawn mower beer)

Thursday, July 22, 2010

The Flandria Fixed Gear (Fixie) Conversion Project

I figured I needed a fixed gear bike. Because I don't have one. Well, really because they are great for training rides and they seem like a lot of fun. Plus I live downtown so I need to fit in.
I have had my mom's old steel bike that she used in college and I actually refurbished for my first triathlon. Well it was stored outdoors all through college and it did not weather all that well. It seemed like a great candidate for a fixed gear bicycle.
Remember from my first project that it is very important to take a lot of before pictures. And to also bag all of your parts. Well I actually started this project before Ash's Azuki Bike but I stopped because I wanted her to have a bike. I do have a few before pics but they are crap quality and finding the parts have made this process much more difficult.
I don't really even remember much of the dissemble process except for the cotter pins. Cotter pins are an interesting way that pedals used to be connected to the cranks. There are a few ways to remove these and it depends on what you have on hand.
Method #1: Use penetrating oil (PB Blaster or WD-40) and a punch. Let the parts soak, the longer the better (24 hours is good). And make sure your punch is smaller than the bolt, the whole point is t avoid ruining the threads(which I did not on my first try but I will show you how to fix that later)
Method #2: Preferred method. Use a cotter pin press. Here is the ultimate tool. But I have tried some interesting setups using a couple pieces of scrap metal and a vice or big c-clamp. I forgot to take a pic but if I do it again I will.


Step 1 - Background, Disassemble
Step 2 - Frame Painting
Step 3 - Handlebar & Fork Assembly
Step 4 - Gearing (Gear Ratio)
Step 5 - Wheels and Hubs
Step 6 - Custom Leather Saddle
Step 7 - Custom Leather Handlebars

Monday, July 12, 2010

Dreg Series: Sour Pale Common

So this beer was the first attempt with my new technique for creating sour beers. So I basically I took my California Common wort (1.044) straight from the kettle after boiling for about 5 minutes. In hindsight I should have allowed the hops to boil in the wort for a specified time to get about 5- 10 IBUs. So next batch I will do that. I only removed a half gallon this time but I might go for a full gallon in the future. So all I did was add the dregs from a Bavik Petrus Aged Pale Ale and I also decided to add the Bavik Petrus Oud Bruin dregs as well just to make sure.


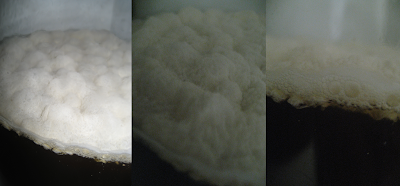
To my surprise in 4 days I had a good bubbling pellicle going. I mean this thing took off. Check out the pics and I will keep updating.
 
7/25/10
Gravity Reading shows 1.040
It appears that the activity that I saw was due to lactic fermentation. I smelled and tasted the sample, delicious like a sweet gueze. It had a wonderful aroma of fruits and berries so I think the dregs have done some work. It was not very sour, just enough to give it a bit of crisp. I have added some of the California Common batch, this will add a bit more hops and yeast. I also added .25 oz of medium toast French Oak boiled for 10 min. This will be interesting where it ends up.

2/5/11 Update
Gravity 1.006
Sorta strange taste on this one - has some fruit flavors, a bit of funk, bit of sourness but the 1/2 gallon of California Common added too much bitterness. I need to decide where to go with this one. Maybe let it sour up a bit more then dry hop. That bitterness should keep fading.
Side note: I am not an sour beer expert (yet) but that looks like pedio on top. (it looks "ropy")

Friday, July 9, 2010

Dreg Series: Explained


So I have a new idea when it comes to making sour beer. So here are the complaints that I often hear about making sour beer:
1) Don't want to miss up the rest of your equipment
2) You don't have enough space to store the beer
3) You don't want to buy more equipment just to store beer
4) It can take a long time and you might not end up with a good beer.

I think I have the answer, well at least for myself. With the exception of a few styles (Flanders Red, Oud Bruin, and Old Ale) I have decided to brew small 1 gal batches. By doing this I can use 1 gal jugs that are pretty cheap ($5.50 with cider at Whole Foods or $8 at the Homebrew Store). I brew about once a month so by then I can drink a gallon of cider (without too many of the bad consequences) or the other alternative is to take whatever yeast I'm using at that time and pitch some in the cider. (cider recipes here)

Now you either think, I like doing small batches for the ability to test an idea OR you think they are a waste of time and expensive. For you that think the later, here is how I appease you. Very simply, just make a extra gallon of wort, so a 6 gal batch instead of a 5 gal batch. The base style of beer does not matter that much for these types of beer and you can usually find a base style that should match your sour beer. For example, a Porter or Dubbel base is great for making Old Bruins or be creative come up with your own new sour styles. You cynics out there might now say I only brew bitter beers and bitter and sour does not mix (which I agree, but sour and hoppy is another story). The way around the bitterness issue is after bringing your batch to a boil and adding your bittering hops only wait a specified time depending on the amount of IBUs you want and then run-off some wort into the gallon container. I understand it is boiling, but I have preheated the container under hot water and have not had a problem. I then cool this wort in the sink.

I do not buy any commercial yeast for these small batches because to me that is cost prohibitive, but I will pitch the dregs from a sour beer (or non-sour bottle conditioned ale). This is nice because I have a great excuse to buy great beer and I have a nice beer to drink as I finish making the rest of the base batch. I try to buy a beer that I want my beer to share similar flavors with. Make sure that you cool the bottle and let it settle, the longer the better. Pour the beer slowly and stop with about an ounce left in the bottle. Swish this remaining beer up very well (~minute), then pitch into your gallon container.

Update:
More recently, I have started making a 6 oz 1.030 - 1.040 starter in a small sauce pan. To make my starter, I reserve runnings from the mash from my previous batch. I run off an extra gallon into a ziploc bag and freeze it. I break off pieces of the frozen wort into the sauce pan. I measure the gravity of the wort with my refractometer and adjust if needed by adding more wort or water. I boil the wort for about 10 min and add 1/8 t of Wyeast yeast nutrient. I put the lid on the sauce pan and let it cool in the sink. Once it is the right temperature, I flame the lip of the bottle and the saucepan. Pour the cooled wort into the original bottle and shake as often as possible or use a stir plate. I try to do this 3 days before brew day.


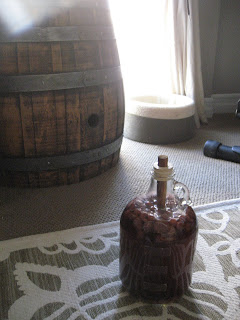
I am fermenting that at ambient temperature which is 68-75F. I use an airlock and rubber stopper, but I am wanting to move towards a breathable bung that cannot dry up like an airlock. Since you are only dealing with a gal of beer, you want to make sure you keep your sampling to a minimum. Plus, with sour beers you want to reduce the contact with oxygen because you risk producing too much acetic acid (vinegar). I currently take a hydrometer sample (4 oz) starting at 6 months and then every 3 months until the gravity has stabilized or I like the flavor. Also at these sampling times I will make some adjustments by adding some boiled oak cubes (.2-.4oz), fresh frozen fruit or maltodextrin (food for Brett and the bacteria) if I want more sour, funky flavors. I then bottle these beers by pouring the gal container into a purged keg with enough priming sugar depending on the beer style and volume. If I like the beer than I can make a full batch the following year and use yeast from the gallon container as a starter.

I will update with my results.
Kreik (Old Beersel Framboise dregs)
Sour Pale Common (Petrus dregs)
Black Jolly Sour (Jolly Pumkin Bam Noire dregs)
The rest of the posts are shown under the "Dregs" tag - see this link

Check the Beer Recipes page for a detailed list (Updated occasionally)

Also I have started a thread over on Homebrewtalk.com, which has grown to over 19,000 views and 20+ pages of updates from other homebrewers.
Easy Way to Make Sour Beers (1 gal wort + dregs)

And you can always email me with questions.
Jeffrey.E.Crane at Gmail.com

Thursday, July 8, 2010

Style Series: California Common

First of all I really don't like the name of this style. Hopefully some day Anchor will release the Steam Beer name. I have not been able to figure out a clever name but that's also not my style. But I will say that brewing in East Village is not Common (see pics). I want to brew to style for this one and that means start with Jamil's recipe. Plus I am not that familiar with the style because really the only commercial style is Anchor steam. So the only change in the recipe was to use Extra Special Malt instead on Pale Chocolate. I did this because first I can't pass up on the name and second I think it will add some toastiness that pale chocolate does but still keeps the color where I want it.

Recipe: California Common
O.G.-1.053  F.G.-TBD   IBU-38 
SRM-12.5   ABV-4.8-5.2%%   Cal-188

Grain Bill (75% Efficiency):
6 lb 2-row Malt (61.5%)
2 lb Munich 10L Malt (20.5%)
1 lb  Crystal 40L Malt 10L (10.25%)
8 oz Victory Malt (5.1%)
4 oz Extra Special Malt (2.5%) 

Hops:
.75 oz Northern Brewing, 8%, pellet, 60 min 30 IBU
.75 oz Northern Brewing, 8%, pellet, 15 min 8 IBU
.75 oz Northern Brewing, 8%, pellet, 0 min 0 IBU
    
Yeast:
200 mL White Labs WLP810 San Francisco Lager (2nd pitch - 1 liter 24 hrs)

Brew Day:
Brewed: 7/3/10
Kegged: TBD

Water:
San Diego (Alvarado) Tap Water
1 campden tablet for 5 gal.

Mash Details:
H2O/Grain Ratio: 1.33 qt/lb
Mash Volume: 3.25 gal
Sacc Rest. Temp/Time: 152F @ 60min
Strike Temp: 169F
Batch Sparge Volume: 4.25 gal
Sparge Temp/Time: 170F @ 30min

Boil Details:
Boil Volume: 6.5 gal
Boil Time: 60min
Post Boil Volume: 5 gal

Ferment Details:
O.G.: 1.053
Ferment Temp: 62F
Length: 14 days in primary
Ferment Temp: 65F
Length: 7 days in primary
F.G.: TBD


9/20/10 Update: This beer was evaluated by some great homebrewers in QUAFF. They were big fans of the carmel malt flavor. But the Northern Brewer aroma just wasn't there. And I agree I dry hopped this beer and it got much closer to what I wanted. Next time I brew this I will probably bump the flame-out addition to 2 oz.

Friday, July 2, 2010

Ash's Huffy Bike Build / Restore Step #5 - Done

For the cables I needed to completely replace the housing and cables for both the brakes and the 3 speed hub. A tip here is to keep everything together and try not to cut anything. Length matters. I headed over to my new favorite bike shop, Velo Cult in North Park. I was able to get the brake cables and housing (they cut the housing to length, which is nice because the proper tool is $25). I also got a universal derailleur cable that turned out to be its own project. I go to install the derailleur cable and the end spindle is the incorrect size. After a slight freak out I decided I can fix this by replacing the current one with my old one. The pictures explain how to do this. I had to be very careful and bend slowly using a vice.
Once that was together the way the internal hub works is by having the correct tension on the cable. It is best described here with the following:
Shimano 3-Speed Hub:
"Slide the pushrod into the axle. Screw the lever assembly onto the axle approximately seven turns. Generally, at just a bit more than seven turns, the lever will not screw on by hand any more. Back it up until the cable connection aligns with the cable.
Put the shifter into second gear and connect the cable to the lever assembly. Turn this connection until the line and circle on the lever itself align with the slot in the lever housing."

That was pretty easy to do, trust me. If the gears are not working well then more than likely you need to oil the hub. I used 10W-30 and pedaled it around a bit and it seems to be working well for being 40 years old.
Next I put the change on which is pretty easy to do with the old style master links. The master link just pops off with the easy push of a screw driver. Then make sure the chain is the right length by hooking it to the back tire and making sure it has no slack and room to be tightened in the drop-outs.
I thought I was done. But as soon as I was finished I couldn't wait till the weekend to tell me wife about it, so I started telling her how it turned out. And she reminded me that she wanted chrome fenders. Sooooo...I'm not done. But luckily this is easy so I ordered some up and installed them quite easily. I have to admit they look way better than the white ones.
Here are a few Before and After pics. I'll following up with some riding photos soon.
Related Posts Plugin for WordPress, Blogger...