Showing posts with label Fermentation Cabinet. Show all posts

Tuesday, June 8, 2010

Brewing Equipment: Fermentation Cabinet - Step 4

So I am not a electronics expert but if someone gives me a diagram of the circuit I can understand it and reproduce it. So lucky for me over at Homebrewtalk.com there are a few experts. And from some extra help from a user named ClaudiusB I was able to get everything wired up. I just used basic wire nuts and the old trusty strippers and was done in 15 - 20 minutes.
Next I had to figure out how to program the thing, which is pretty easy if you can follow directions. ON advice from some forum users, I set my controller to have a 3 degree range, and a 30 minute rest period. The point of this is to reduce the cycling of the compressor as to not wear it out.


So all that was to do was to fill the shelves with brew stuff. No Problem.


Step 1 - Fridge Disassemble

Step 2 - Cabinet Build

Step 3 - Painting and Insulation


Monday, June 7, 2010

Brewing Equipment: Fermentation Cabinet - Step 3

Alright so I have the whole structure built. Now I need to install the doors for the fridge compartment and the insulation. I decided to go very simple here and just use 3" hinges. They are cheap and easy to install. Plus this is going into a closet so I am not terribly worried about the ascetics. Once everything is painted it will look nice enough.


I cut the insulation with a drywall knife which I found to be the easiest. A razor blade wasn't quite thick enough plus it tends to find its own path while cutting. I had very simple measures for my fridge chamber, I need (4) 12"x12"(top and bottom, double thick) and (8) 12" x 24" pieces for the sides. I ended up not needing glue they all press fit in (in the near future I am covering the sides with melamine, just having a tough time sourcing it). For the front door I used contact cement to put the 2 pieces together and then the same to the door. It was pretty easy to line up by just partially closing the door and holding the insulation in place and marking the corners. I then taped off all the edges to prevent the insulation from being destroyed over time.
So now was painting time everything got a coat of primer and then white gloss to blend in with the paint in the closet. Pretty easy job with a mini roller.
Next onto wiring.


Step 1 - Fridge Disassemble

Step 2 - Cabinet Build


Step 4 - Wiring and Organization

Monday, April 26, 2010

Brewing Equipment: Fermentation Cabinet - Step 2

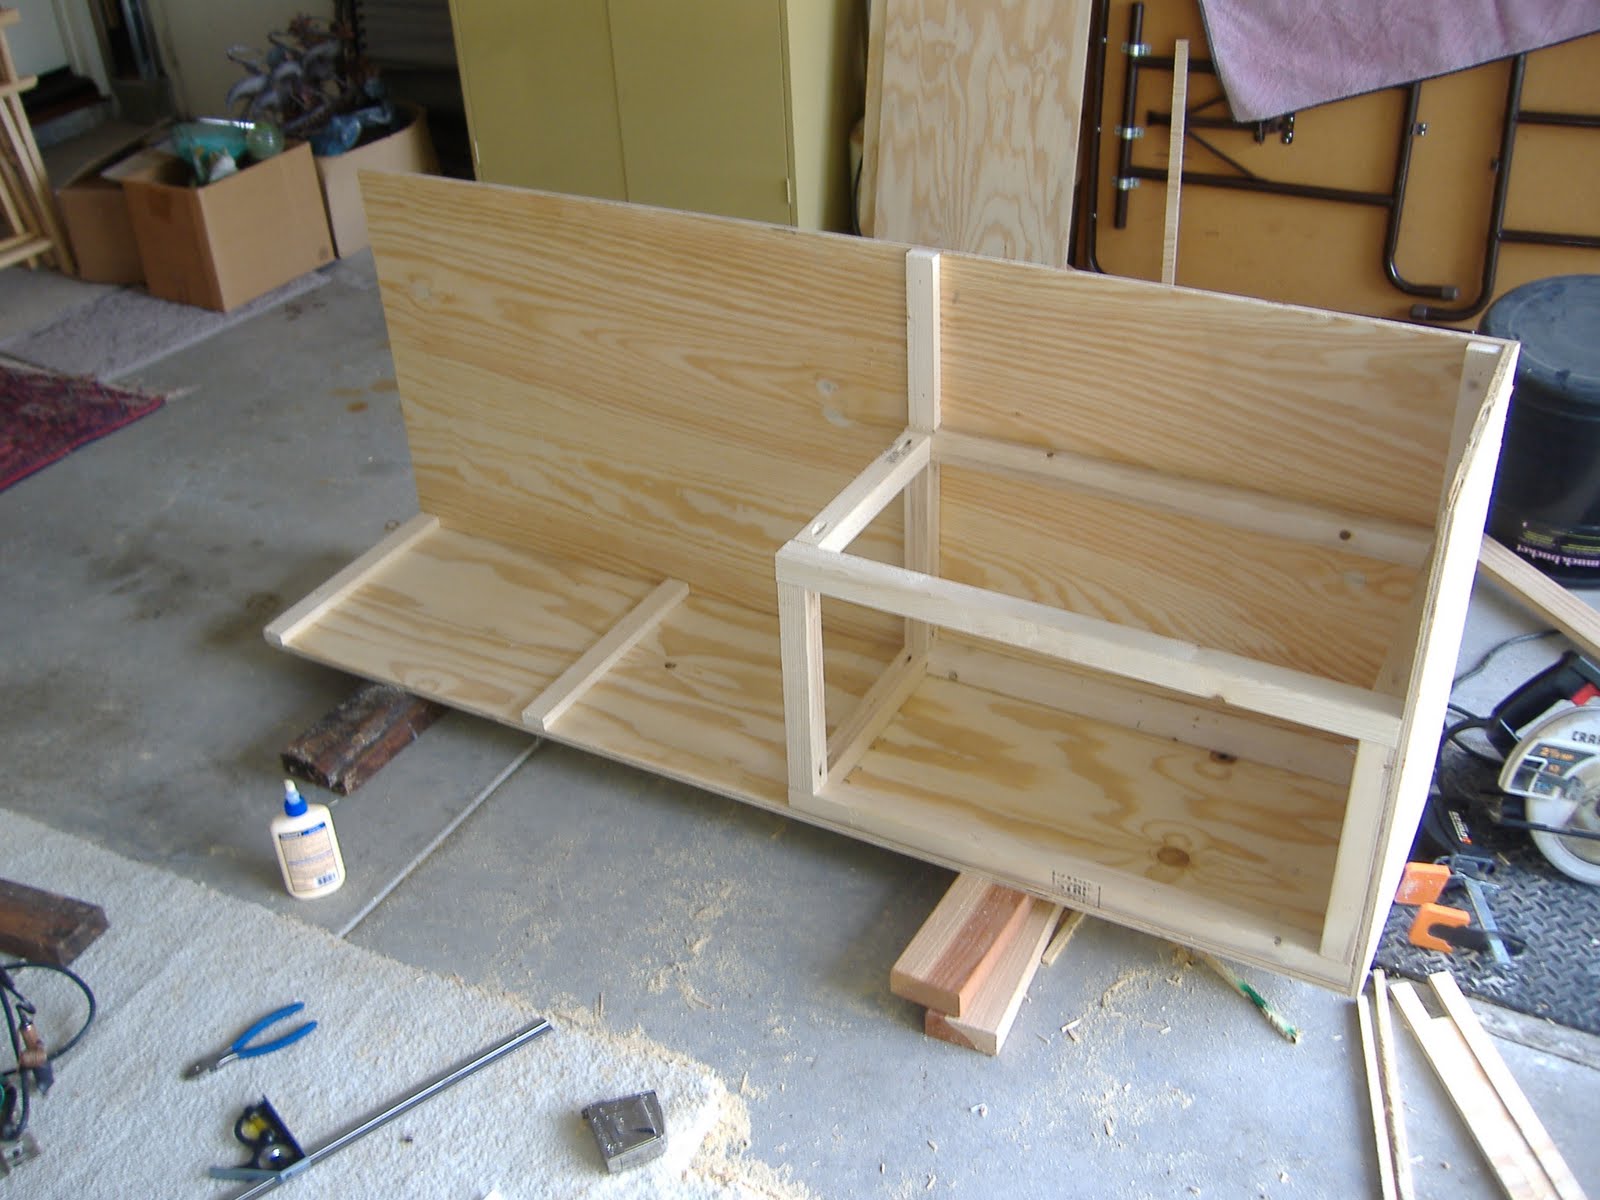
The next step is to build up the cabinet to to fit the fridge guts into. I have a very specific area where this cabinet will go. Basically my space is 66" tall x 25" wide and 16" deep. This is a pretty small space but it works for my equipment. I have space in the fridge compartment for one 5 gal carboy or 2 - 3 gal Better Bottles. And then there is 2 shelves plus the top so I can fit the rest of my equipment.
I need to buy a temperature control unit for the fridge compartment. I read through Homebrew talk for a while and decided on a Love TSX - 10140.
One way to wire this controller to the fridge is done by the below wiring diagram.

So here are some pictures of the build (a bit blurry)

Still need doors, insulation installed, wiring completed and then finishing and paint.
Step 1 - Fridge Disassemble


Step 3 - Painting and Insulation

Step 4 - Wiring and Organization

Brewing Equipment: Fermentation Cabinet - Step 1

After many hours of internet research I have decided on my plan for my fermentation cabinet. I have reviewed all the different options available to me. I spent quite a few hours on the Homebrew Talk.
I live in a condo in Downtown San Diego so I don't have a ton of room. Plus the wife has limited my beer equipment to the closet in the office. I needed a way to organize all my equipment in the closet so I figured this would be a great time to build myself a temperature controlled fermentation cabinet.
I really liked the cabinets that used the fridge guts. The look clean and seem to be a fun DIY project. One step that many of the fridge gutted cabinets was how to get the guts out. They simply say it was hard but here it is. So I decided to document myself doing the demo.
Here is the first fridge:
I busted this one in 2 places. First I punctured the freezer unit with the Reciprocating saw then I broke the cooper line while trying to pull it out. Any break in the system and you are done. The price to fix it and recharge with new coolant is more expensive and time consuming then starting over. I did salvage a few parts that I may use on another project.
Lessons Learned:
1) Try to find a mini fridge that only the freezer compartment does the cooling
2) Don't use a Recipicating Saw - its just too out of control
3) Be careful and take your time, don't take shortcuts

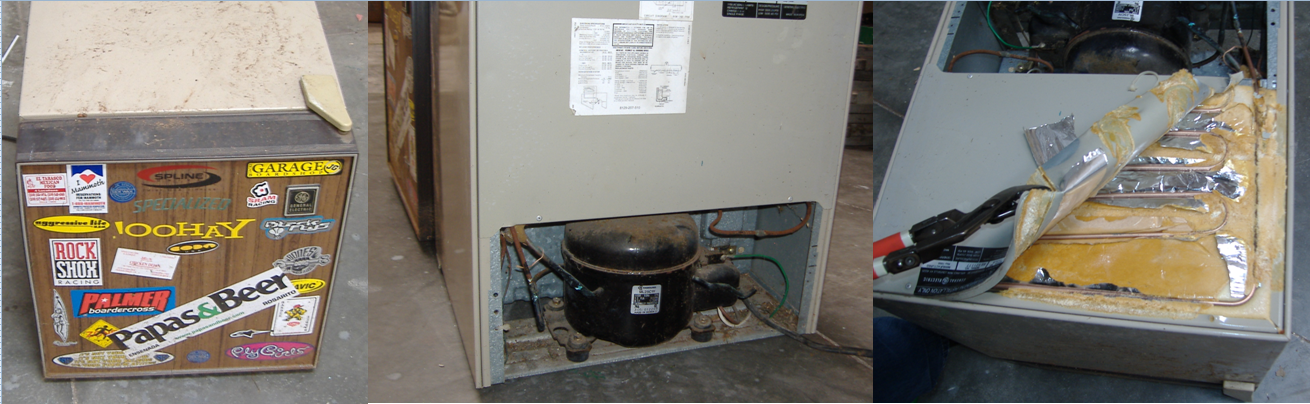
So I listened to my own advice and found a cheap mini fridge off of Craigslist:

I took my time with this one and used far simplier tools. I cut the outside sheeting off with shears which was very easy. And used the Reciprocating saw blade by hand to cut through insulation or a drywall knife would be perfect. If you have any questions, I feel like an expert now.
Step 2 - Cabinet Build
Step 3 - Painting and Insulation
Step 4 - Wiring and Organization
Related Posts Plugin for WordPress, Blogger...