Showing posts with label beer equipment. Show all posts

Thursday, April 25, 2013

Beer Equipment: Wine Barrel Stave Keezer Build

HARD WORK WARNING: Project took way more time & effort than planned. I also did a ton of research so I hope someone else can  benefit.

After brewing for years, I finally have the opportunity to serve my beer through a tap. I was previously limited to using 2.5 gal kegs and a picnic tap on a shelf in our fridge when we lived in the Downtown condo. With the new house, I have space in the garage, which means it is time to build myself a kegerator (or in this case a keezer).


Freezer:
The first thing to decide was what size or how many taps do I want (and what will the wife let me get away with). I figured about 4 taps would give me a good amount of variety and shouldn't take up too much space. Also fortunately 7 cu ft freezers are pretty common and most fit 4 corny kegs. So I started price shopping and my timing was right. It was right around Black Friday and Home Depot was having a super sale on the GE 7.0 cu. ft. Chest Freezer Model # FCM7SUWW for $169 shipped. During my initial research on Homebrewtalk.com I saw this model could hold 4 corny kegs (ball-lock only).

Design:
My next decision was to figure out what I wanted it to look like, so back to Homebrewtalk.com. And 450 pages later I had a pretty good idea. I was going to go the "simple" route of building a wood collar for your taps to go through. The first major choice was to attach the collar to the lid or attach it to the freezer. I decided to attach mine to the lid and here are the reasons:

Pros: Taps and lines lift out of your way when adding new kegs - don't need to worry about bumping shanks and easy to slide kegs in, Lower height to lift kegs into freezer.
Cons: Lid can be heavy, must remove rubber seal

Collar:
Then I needed to decide what I wanted the collar to look like. The easy way is to use 2x4s or some people who want to add kegs on the compressor hump use 2x8s to accommodate for the added height. Well, I decided to be unique and add a lot of extra work. I had an idea to make the collar from used wine barrel staves. (I debated also using old weathered wood to give me the farmhouse rustic look, but that would have been too easy.)

Now that I decided on wine barrel staves I had to source them. I was having a hard time finding used barrels at the time in San Diego. If I was drive up to the Central Coast there are a few options. I did however find a local company, Barelly Made It, that builds furniture from used barrels. A quick email to Gustaf Rooth and I was headed over to his workshop to pick out some staves and a barrel head.

The next big choice was how to fabricate a rectangular collar from curved staves. I had 3 ideas:

  1. Straighten the staves by wetting them and using large weights. After watching a bunch of youtube videos I think it might have been outside my ability. (I still may try at some point)
  2. Fill behind the curved sections with cut wood so that the back is flat and the pieces can be attached to one another. The curvature is pretty big and would require 3 -4" in thickness, which would look strange
  3. Use the straight sections of the staves. Along the 36-38" oak stave length, 9" on each end are pretty straight and almost all the curvature is in the middle section. There is still some curve in the "straight" 10" pieces, but if they are cut into 4.5" pieces then that is reduced.
So I ended up going with ~4.5" pieces and therefore would need 18 pcs (2 rows of 9) to reach across the front. The next issue is the bevel on the stave, but this was fixed by flipping the pieces opposite to one another or alternating the wine and oak faces. All the pieces were cut to length with 45 degree ends.

The two alternating pieces were glued and clamped. Then the two vertical pieces were glued and clamped to another set

Then the individual sets were glued, clamped and tightened together with a tie down strap.


After this was together the edges were cleaned up with a table saw. And all the joint interfaces were sanded to help them blend together better. I then drilled the tap holes with a 7/8" bit (use a pilot hole or drill press to get a level hole - I did a pour job). I used a wood rasp to clean the holes and checked the fit before gluing it all together.

For the sides, I decided to make them easy by using the barrel head and just ripping 2 pieces to the correct height on the table saw. Plus it made it look more like a barrel. For the back I just used a scrap piece of pine that was ripped to the proper height. This won't be seen so it doesn't matter.

Next was to glue all the pieces together to form the collar, this was done again with wood glue and my tie downs. I used a couple pockets screws on the back panel since it didn't have a mitered cut and I wanted to hid the back piece.


I cut the factory seal with a razor blade all the way around the lid. This was pretty easy to do and made it easy to re-use the seal.
Per Gustaf, I just used natural Bees Wax to protect and finish the wood. Then I used liquid nails to attach the collar onto the lid and clamped in place over night. 

I used silicon caulking to attach the factory seal and closed the lid. I added some weight and left it to cure overnight. All that was left was to screw the lid back into the hinges with wood screws.

Temperature Control:
I had originally bought Elitech 110V All-Purpose Temperature Controller+ Sensor 2 Relay Output Thermostat Stc-1000 to use for my temperature control. And then I found this thread on homebrewtalk about tweaking the freezer's internal thermostat . And in Post #75 it shows it working on my GE 7 cu ft freezer. I had to try this and over the course of a week and the screw turned in all the way it worked. The bottom section is around 38 degrees and the top is around 40 degrees with +/- a degree. This is a bit colder than I prefer, but I'm fine with it since it makes my job much easier.

Tubing, Taps and Misc Parts:
The cheapest way is to wait until the deals are going, that is if you can wait till November each year. I got my bigger stuff during those sales at the places below. Below is almost everything you need for a 4 tap (+ 1 inside tap) keezer (I had a few things like disconnects, a regulator and CO2 tank).

Adventures in Homebrewing had great Black Friday Deals and I got the following:
Perlick Stainless Steel 525ss Perl Faucet 
4 1/8" Shank for Faucet

Kegconnection also does a huge Black Friday Sale and in addition has the best pricing year around (this was compared to my local Beverage Factory and a few other big online shops)
I got a 5 way manifold, but it appears they are different now (and Amazon has it too)
Then the rest of the hoses, disconnects and tools.

I'm not going to go into much depth here because it is somewhat basic, but if you have questions feel free to ask in the comments

Tap Handles:
I couldn't really decide on what I want, but in the mean time I used some scrap pieces of the oak staves. I picked up some 3/8-16 x 7/16 Tee Nuts at Home Depot because it was convenient. I made a larger than needed hole and hammered them in, but then decided to epoxy them to make it more solid. You can also use the proper brass tap handle inserts. Mine are basic until I get more creative and try to weld some old vintage bike parts together to make new ones.

It is pretty nice to have beer on draft so I can have half pints with dinner or get creative and do some blending right at the taps.

Thursday, May 19, 2011

Session Series: San Diego Session Saison

The idea for this beer came to me at the Stone Brewing AHA Rally a couple of months ago. It was a warm day and we were consuming a good amount of beverages and a lot of those beers were just big beers. I am very much a weather or situational drinker. (Just like I think it is gross for people to drink Milk at breakfast, it's a dinner drink). For me when the weather is warm I want a dry beer with a decent amount of carbonation. It needs to be thrist quenching. Which I completely associate with Belgian Saisons. They hit you with all this great flavor, but the best ones are nice and dry so they don't stay on your tongue too long and the high carbonation flushes your mouth for the next gulp.


With that thought in mind, I wanted to tailor this beer to have local influences. Considering I live 20 miles from the Mexican border. I thought I would try to use some traditional Mexican ingredients. The difficult part with this is trying to translate food flavors to beer flavors and still maintain the light refreshing beverage I was hoping for. I started thinking of some of my favorite Mexican dishes, like Mole, Chile Verde and fresh Tamales. A Mole beer sounds pretty amazing actually, but I don't see that relating well to a session style (For my Dark Saison coming up, this may work out nicely). The next one that hit me was the maize from the Tamales. As a brewer I can easily use flaked corn (though I may try maize next time), Plus the flaked corn will really help to lighten the body and help me achieve that easy drinking, warm weather beer. A few other ingredients I will experiment with in small secondary batches include Ancho chiles (Jeff B's idea at 1227 Brewing), cilantro, and  lime only seems logical.


Saisons also traditionally have some simple sugars added to help them dry out. I probably don't need to add the simple sugar because this beer should dry out due to the yeast I selected (Wyeast 3711). But for this beer the sugar addition will allow me to add another traditional Mexican ingredient and another layer of flavor. I will be using piloncillo, which is basically mexican brown sugar and is used in traditional beverages like tepache.


The final decision for this beer comes down to yeast selection. I think more than any other style the yeast for a Saison is crucial. The flavors for this style are almost all yeast driven. I did a fair amount of reading on BabbleBelt about Saisons. I finally decided on the Wyeast 3711: French Saison it got some great reviews, finished quickly and only needed to be brewed in the 70s. The temperature was a big key on this one because I am doing my first 10 gal batch. The larger batch meant I needed another fermenter so I am trying another first, fermenting in a keg (it worked great and I might be a convert once I have a bigger fridge).


Recipe: San Diego Session Saison
O.G.-1.044  F.G.-1.006   IBU-21 Size -10 gal
SRM-3   ABV-4.8%  

Grain Bill (76% Efficiency):
12 lb Belgian Pilsner (80%)
2 lbs Flaked Corn (13%)
1 lb Piloncillo Sugar (7%) - added to Boil


Hops:
.8 oz Amarillo, 9.5%, pellet, 60 min, 17.6 IBU
2 oz Saaz, 3.2%, pellet, 10 min 3.2 IBU

Yeast:
Made 1.5 L starter divided equally of Wyeast 3711: French Saison

Brew Day:
Brewed: 4/3/11
Kegged: 4/16/11

Water:
San Diego (Alvarado) Tap Water
1 campden tablet for 5 gal.

Mash Details:
H2O/Grain Ratio: 1 qt/lb
Mash Volume: 3.5 gal
Sacc Rest. Temp/Time: 148F @ 60min
Strike Temp: 161F
Sparge Volume: 9 gal
Sparge Temp/Time: 170F

Boil Details:
Boil Volume: 11 gal
Boil Time: 60min
Post Boil Volume: 10 gal

Ferment Details:
O.G.: 1.044
Ferment Temp: 65-67F(carboy version)
Ferment Temp: 72-76F (keg version)
Primary Length: 10 days

This yeast performed just like all the reports I read. It took off quite quickly and it appeared most of the fermentation was done in a few days. I didn't measure the gravity at that time. The keg fermented version was transferred, force carbonated and drank at my friend's bachelor party all within 2 weeks of being brewed.

I will follow-up with a side by side tasting of the 2 versions.


Tasting 6-6-11

Wednesday, February 2, 2011

Brewing Equipment: Mash Paddle - FREE

Well, it was free for me. And if you had to pay for the wood (depending on type) it should cost less than $10. Most people have some wood leftover from a project, in my case, trim left over from the Brewing Cabinet. I did a bit of research on materials that people have used for making their own. Most people including myself used Oak, which is a hardwood. And is recommended over Pine, but to be honest the contact time with the mash is pretty short so I doubt it has much effect. Others have used cutting board oil on their paddles (that sounds dirty) to make them look a bit better. I think that is overkill and an unnecessary risk to your beer.


My process was simple, do a Google Image Search for "Mash Paddle" (you may want to turn on your safe search at work). Start to get an idea of the shape and dimensions. I just have a 5 gal Igloo so I don't need something very big. I liked the look of the oar paddles and the custom images cut in the paddle were also a nice touch.

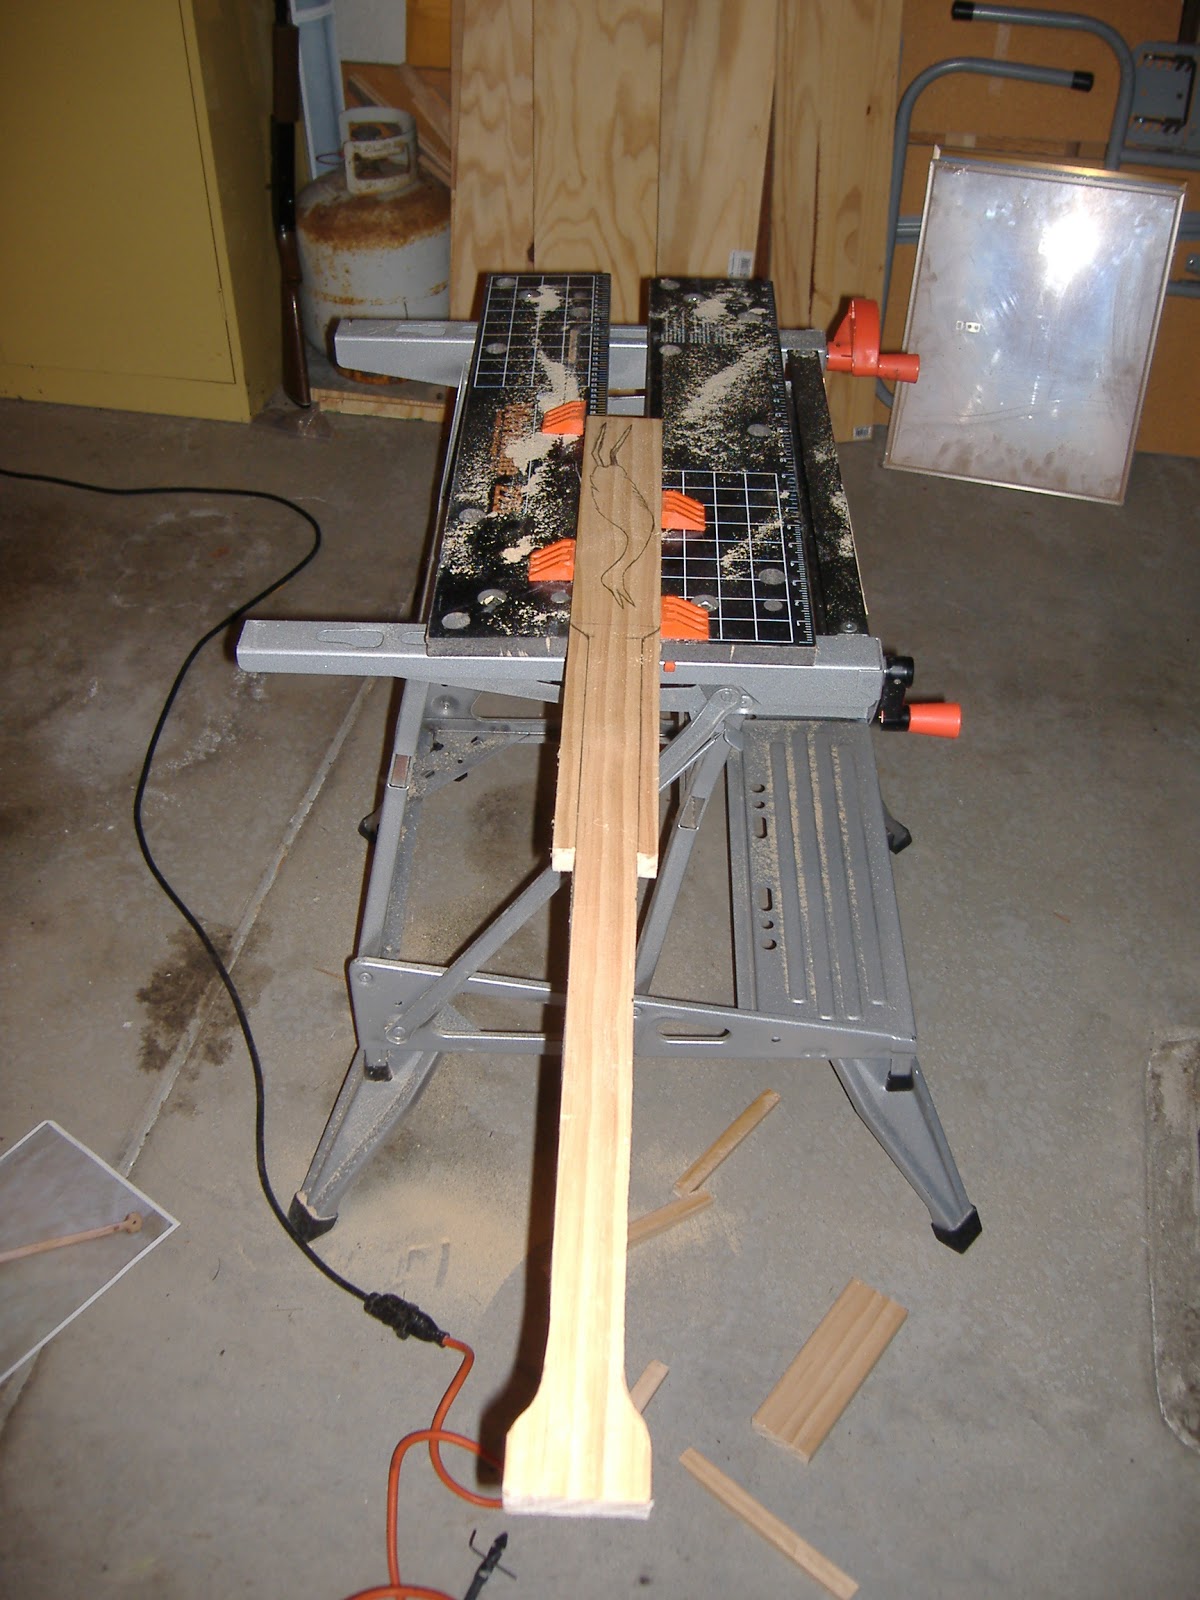
I ended up with a 30" x 2.5" x .5" starting piece. I drew freehand onto the piece with pencil. Then for the paddle end cut out, I traced through a image I found.


After a few tweaks, I pulled out the jig-saw and started cutting. Some good clamps and a work bench make all the difference. To make it look professional I busted out the router and gave all the edges a nice round.


A final sanding with coarse sandpaper to fix all the corners and then used some fine sandpaper for a nice finish.


And it works great.

Tuesday, June 8, 2010

Brewing Equipment: Fermentation Cabinet - Step 4

So I am not a electronics expert but if someone gives me a diagram of the circuit I can understand it and reproduce it. So lucky for me over at Homebrewtalk.com there are a few experts. And from some extra help from a user named ClaudiusB I was able to get everything wired up. I just used basic wire nuts and the old trusty strippers and was done in 15 - 20 minutes.
Next I had to figure out how to program the thing, which is pretty easy if you can follow directions. ON advice from some forum users, I set my controller to have a 3 degree range, and a 30 minute rest period. The point of this is to reduce the cycling of the compressor as to not wear it out.


So all that was to do was to fill the shelves with brew stuff. No Problem.


Step 1 - Fridge Disassemble

Step 2 - Cabinet Build

Step 3 - Painting and Insulation


Monday, June 7, 2010

Brewing Equipment: Fermentation Cabinet - Step 3

Alright so I have the whole structure built. Now I need to install the doors for the fridge compartment and the insulation. I decided to go very simple here and just use 3" hinges. They are cheap and easy to install. Plus this is going into a closet so I am not terribly worried about the ascetics. Once everything is painted it will look nice enough.


I cut the insulation with a drywall knife which I found to be the easiest. A razor blade wasn't quite thick enough plus it tends to find its own path while cutting. I had very simple measures for my fridge chamber, I need (4) 12"x12"(top and bottom, double thick) and (8) 12" x 24" pieces for the sides. I ended up not needing glue they all press fit in (in the near future I am covering the sides with melamine, just having a tough time sourcing it). For the front door I used contact cement to put the 2 pieces together and then the same to the door. It was pretty easy to line up by just partially closing the door and holding the insulation in place and marking the corners. I then taped off all the edges to prevent the insulation from being destroyed over time.
So now was painting time everything got a coat of primer and then white gloss to blend in with the paint in the closet. Pretty easy job with a mini roller.
Next onto wiring.


Step 1 - Fridge Disassemble

Step 2 - Cabinet Build


Step 4 - Wiring and Organization

Monday, April 26, 2010

Brewing Equipment: Fermentation Cabinet - Step 2

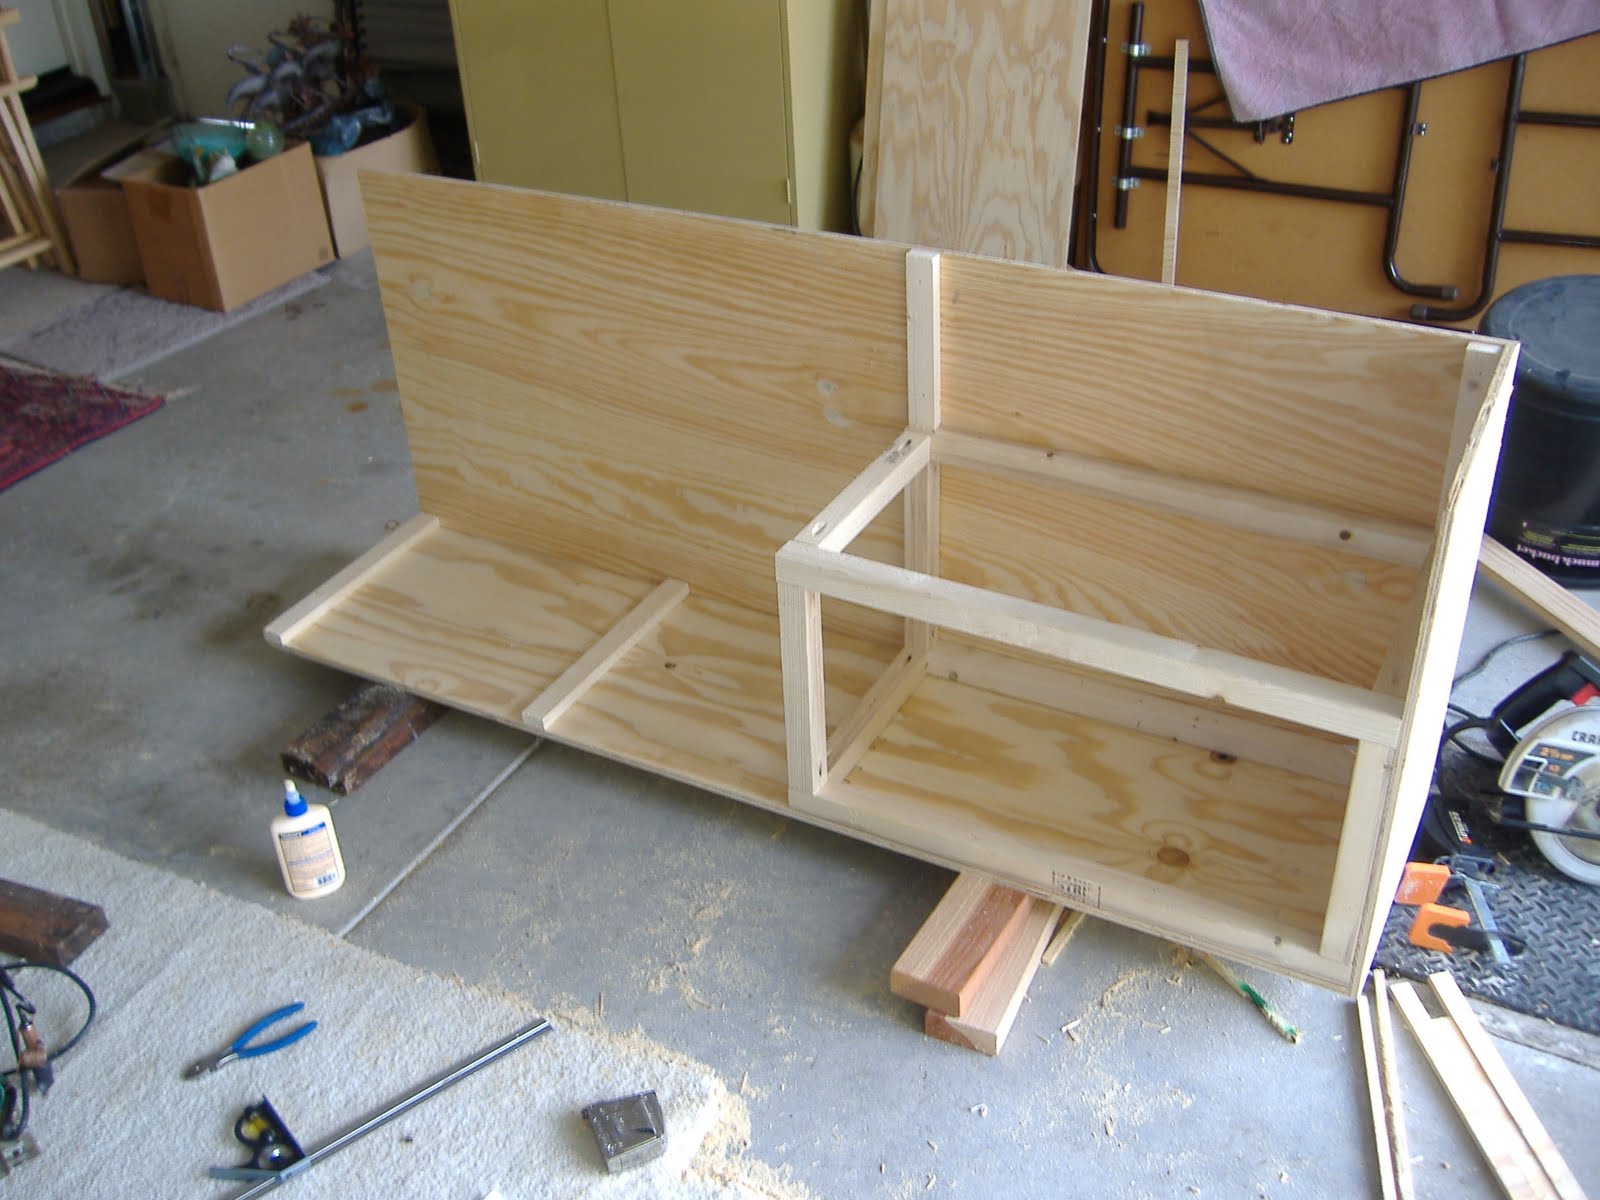
The next step is to build up the cabinet to to fit the fridge guts into. I have a very specific area where this cabinet will go. Basically my space is 66" tall x 25" wide and 16" deep. This is a pretty small space but it works for my equipment. I have space in the fridge compartment for one 5 gal carboy or 2 - 3 gal Better Bottles. And then there is 2 shelves plus the top so I can fit the rest of my equipment.
I need to buy a temperature control unit for the fridge compartment. I read through Homebrew talk for a while and decided on a Love TSX - 10140.
One way to wire this controller to the fridge is done by the below wiring diagram.

So here are some pictures of the build (a bit blurry)

Still need doors, insulation installed, wiring completed and then finishing and paint.
Step 1 - Fridge Disassemble


Step 3 - Painting and Insulation

Step 4 - Wiring and Organization

Brewing Equipment: Fermentation Cabinet - Step 1

After many hours of internet research I have decided on my plan for my fermentation cabinet. I have reviewed all the different options available to me. I spent quite a few hours on the Homebrew Talk.
I live in a condo in Downtown San Diego so I don't have a ton of room. Plus the wife has limited my beer equipment to the closet in the office. I needed a way to organize all my equipment in the closet so I figured this would be a great time to build myself a temperature controlled fermentation cabinet.
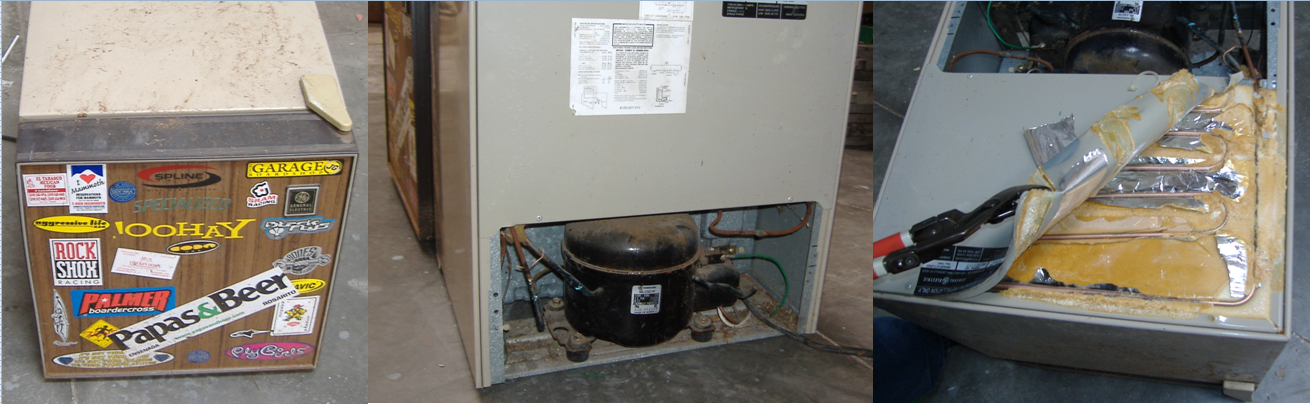
I really liked the cabinets that used the fridge guts. The look clean and seem to be a fun DIY project. One step that many of the fridge gutted cabinets was how to get the guts out. They simply say it was hard but here it is. So I decided to document myself doing the demo.
Here is the first fridge:
I busted this one in 2 places. First I punctured the freezer unit with the Reciprocating saw then I broke the cooper line while trying to pull it out. Any break in the system and you are done. The price to fix it and recharge with new coolant is more expensive and time consuming then starting over. I did salvage a few parts that I may use on another project.
Lessons Learned:
1) Try to find a mini fridge that only the freezer compartment does the cooling
2) Don't use a Recipicating Saw - its just too out of control
3) Be careful and take your time, don't take shortcuts

So I listened to my own advice and found a cheap mini fridge off of Craigslist:

I took my time with this one and used far simplier tools. I cut the outside sheeting off with shears which was very easy. And used the Reciprocating saw blade by hand to cut through insulation or a drywall knife would be perfect. If you have any questions, I feel like an expert now.
Step 2 - Cabinet Build
Step 3 - Painting and Insulation
Step 4 - Wiring and Organization
Related Posts Plugin for WordPress, Blogger...