

A great site about custom handlebar tape and bike saddles - has some great ideas here.
An Instructables Guide about re-covering leather bike saddles. I basically followed dead on 9make sure to read the comments for some extra tips)
Another Instructable Guide about bicycle saddles and equally helpful
So here are some pictures and tips that I picked up while making mine.
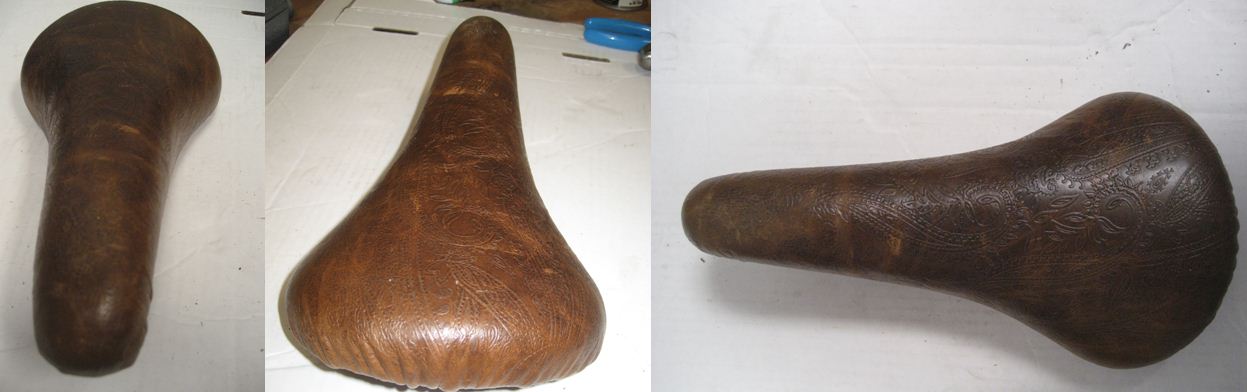
 1. The best place to get leather is an Upholstry store. They have a great selection and often a bunch of scrap pieces that will be big enough for a bicylce saddle. I originally was going to just go straight black leather, but once I saw this distressed leather with paisleys I was sold.
2. It is best to use the old cover as a template. If not, just trace around the saddle and error on the side of too much material. You will probably need to trim as you go anyways.
3. All bike saddles are built a bit different. You want to start by securing the leather to the nose of the saddle. I used staples right into the hard plastic case. This seemed to work well. The trick is to keep folding and stretching the leather till it looks smooth around the front. Then put in a couple more staples into the nose to hold down the folds.

5. Starting at the nose, stretch and smooth the leather as you work towards the back of the saddle. Pull the leather around the sides and trim. You want about a 1/2" of over hang so that you have enough of a surface to glue but not too much or it will create big folds.


8. Let the saddle dry for a few days.
Coming up next....Custom handle bar tape from the same leather.
Step 1 - Background, Disassemble
Step 2 - Frame Painting
Step 3 - Handlebar & Fork Assembly
Step 4 - Gearing (Gear Ratio)
Step 5 - Wheels and Hubs
Step 6 - Custom Leather Saddle
Step 7 - Custom Leather Handlebars

No comments:
Post a Comment